Decorative Finish: Geo Textile Square

Geo Textile Square by True Faux Studio
DECORATIVE FINISH HOW-TO

Geo Textile Square

Artist: True Faux Studio

Share this article

PROJECT SUPPLIES:

INSTRUCTIONS:

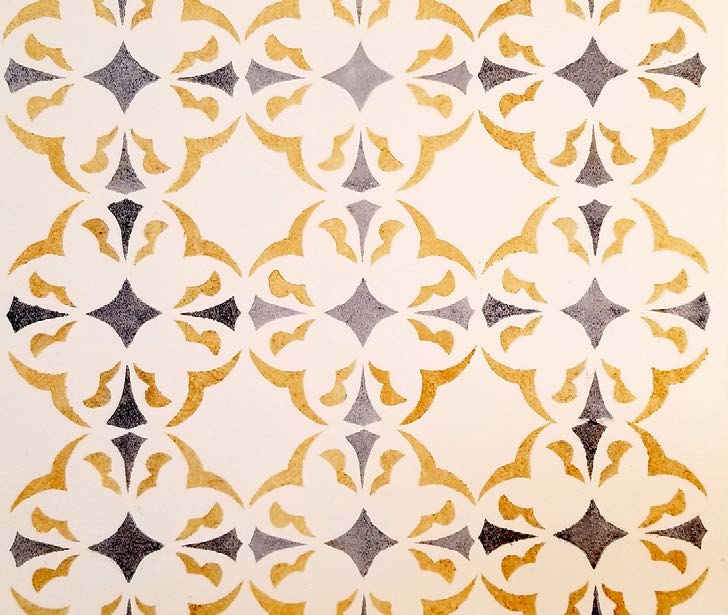
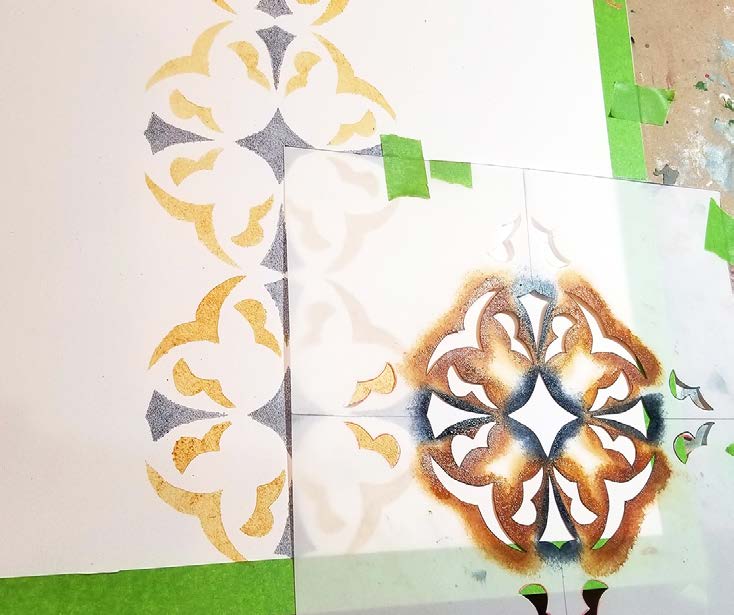
1 | Base coat with a white latex paint in a satin sheen. Let dry. Create or buy a textile pattern stencil to cover an 18” square. We made a 6″ stencil and repeated it 9x.
(Photo 1)

2 | Create the following medium and color mixes:

Medium: Mix 1:1 Golden Artist Colors Matte Medium and Clear Top Coat Dead Flat

From this medium make 2 colors at 1:1 ratio:
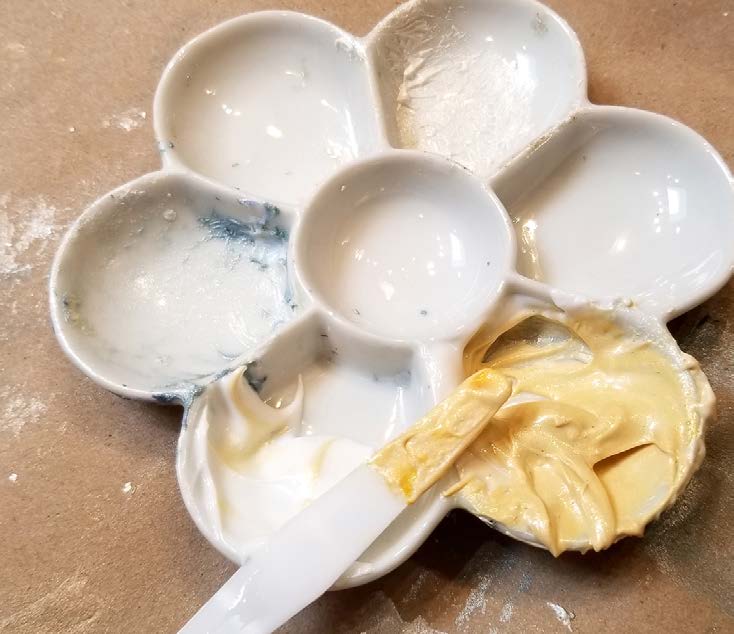
Color 1: Theme Paint Transparent Brown Oxide with Slow Dry Fluid Acrylic Ultramarine Blue
Color 2: Theme Paint Transparent Brown Oxide and Transparent Yellow Oxide

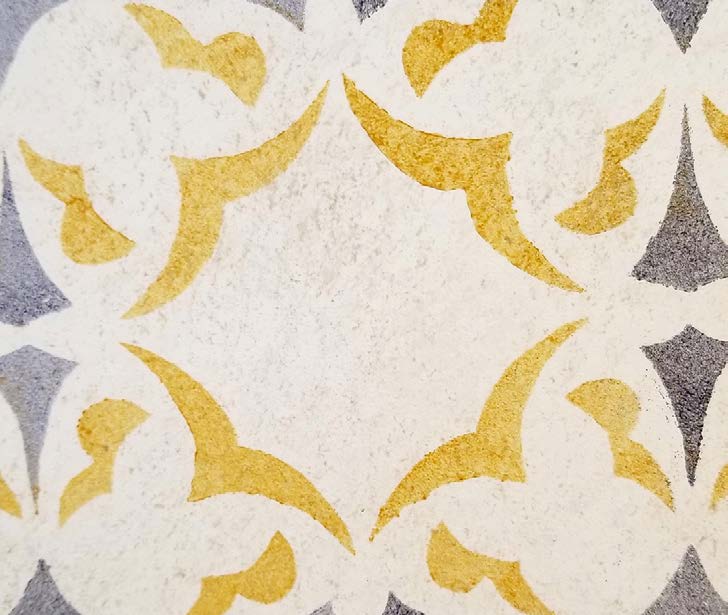
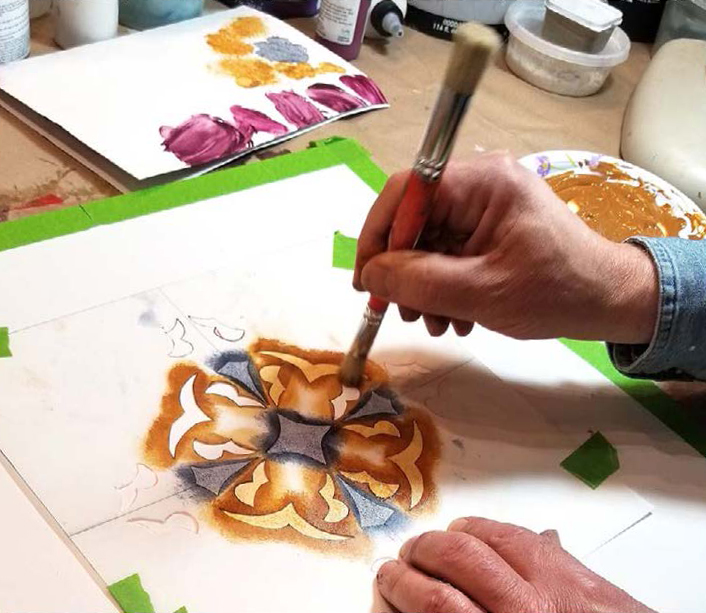
3 | Use the colors from Step 2 to stencil in the design. Let dry.
(Photos 2-3)

4 | Sponge a very transparent mixture of Golden Artist Colors Matte Medium with a cool gray color to tone and texture. Create the gray color with a 1:1 ratio of Theme Paint Transparent Black Oxide and Slow Dry Fluid Acrylic Ultramarine Blue.
(Photo 4)

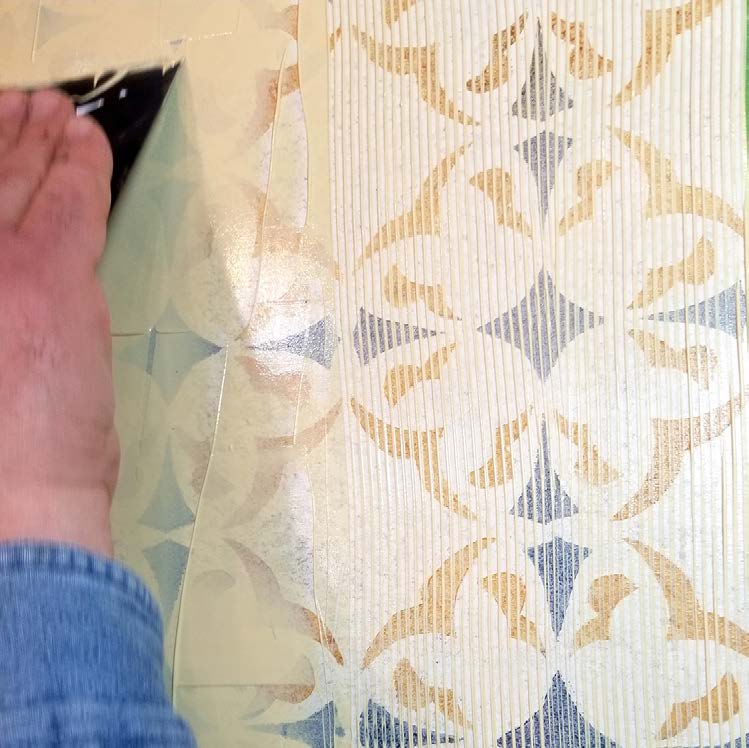
5 | Blade Soapstone mixed with Theme Paint Transparent Yellow Oxide in one direction. Keep wet. Using a metal comb, pull through straight as possible in the same direction. Let dry.
(Photo 5)

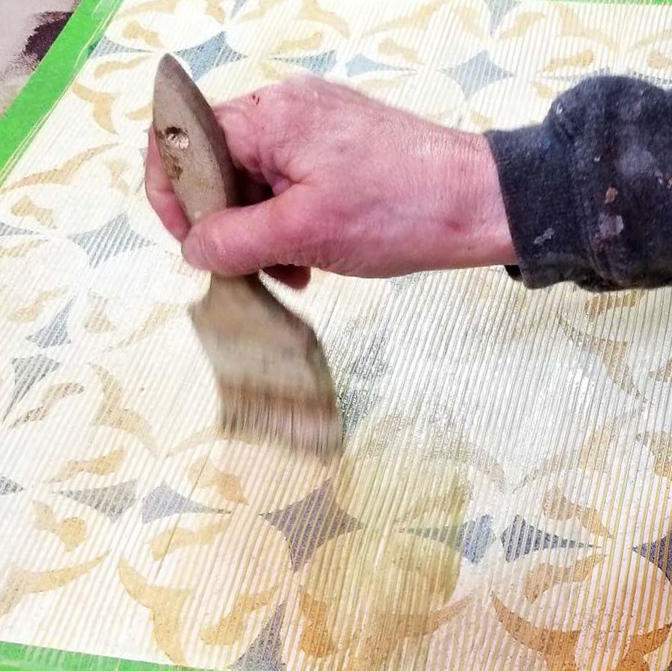
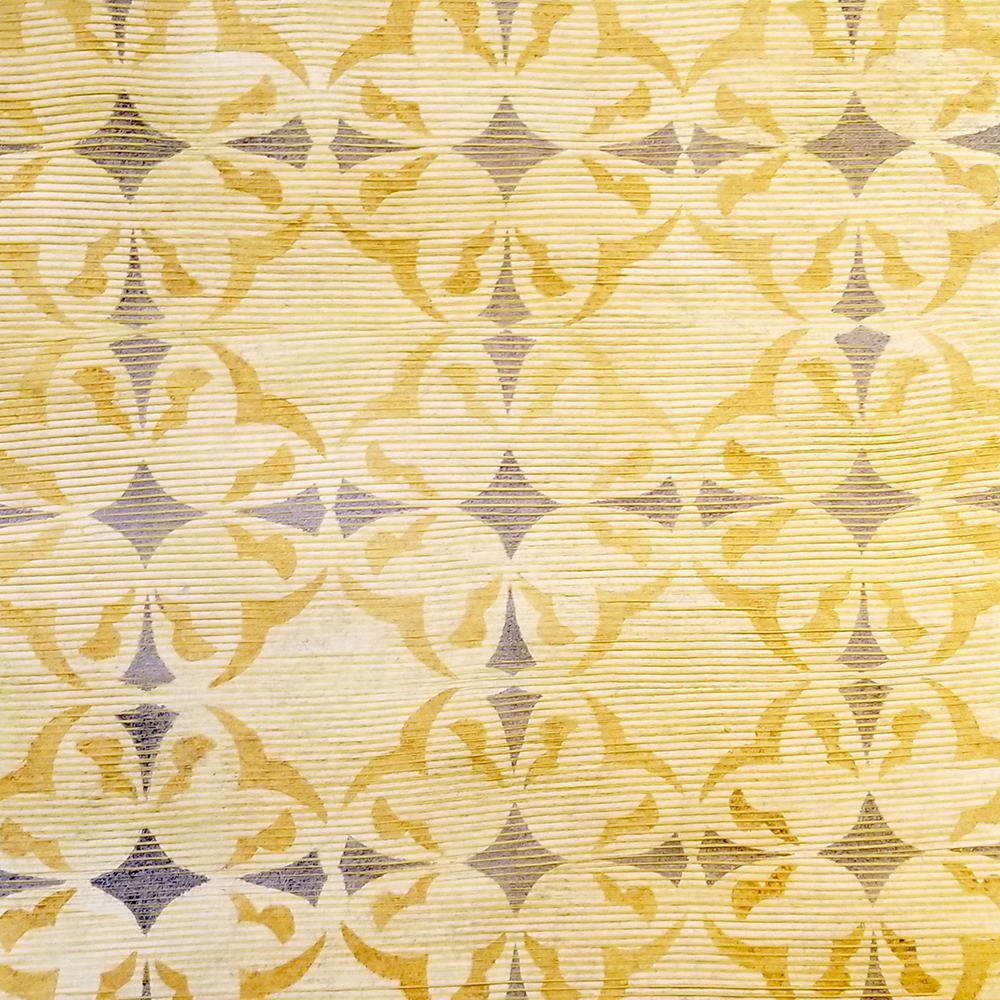
6 | Tone the top with two washes. Use each of the stencil colors with the medium from Step 2 and add a drop of the Slow Dry Fluid Acrylic Chromium Oxide Green. Dilute with water to a thin wash. Apply randomly and loosely with a chip brush to give it a woven-like patina. Let dry.
(Photo 6)

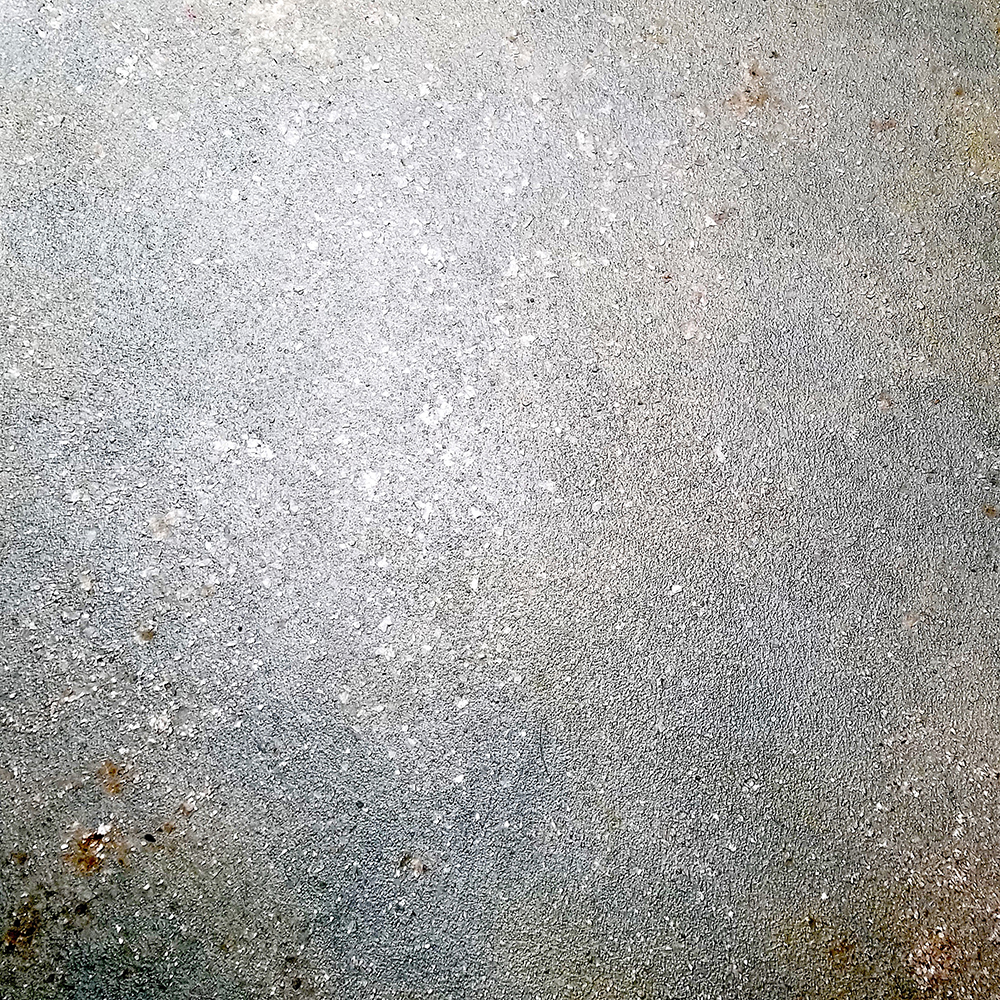
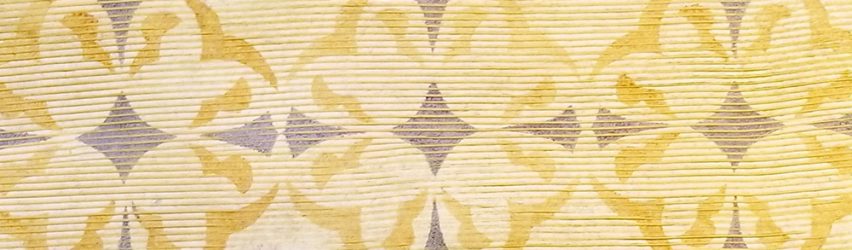
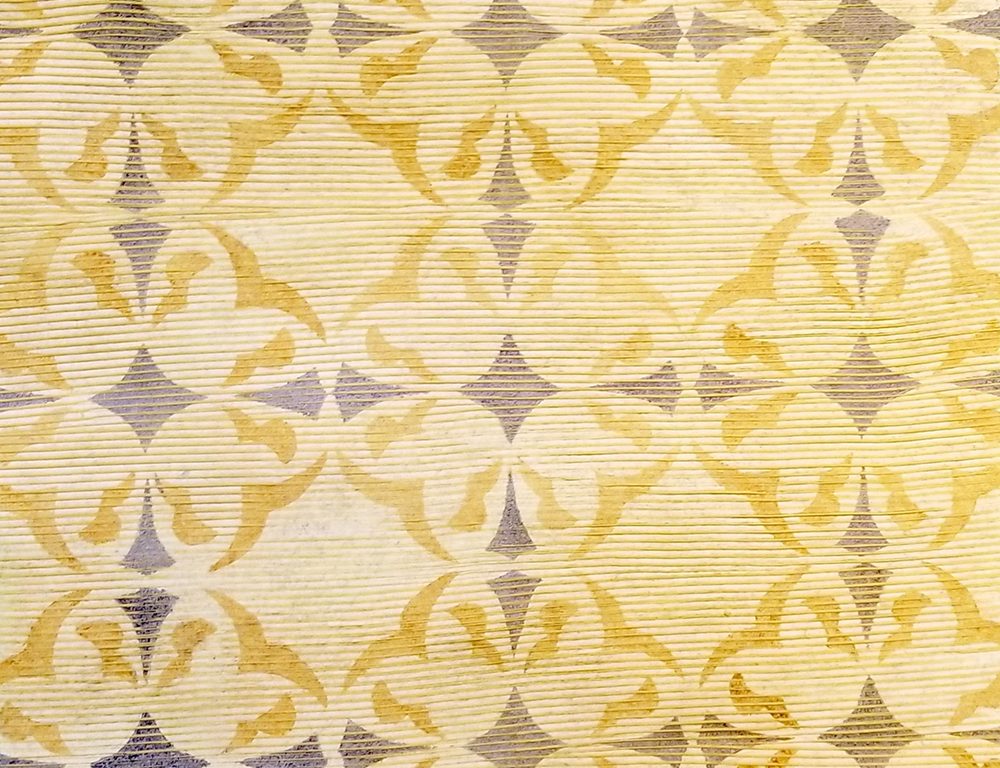
Here is the final texture.
(Photo 7)

Decorative Finish: Blue Mica Pearl

Blue Mica Pearl by True Faux Studio
DECORATIVE FINISH HOW-TO

Blue Mica Pearl

Artist: True Faux Studio

Share this article

PROJECT SUPPLIES:

INSTRUCTIONS:

1 | Base coat with Benjamin Moore Woodlawn Blue HC147. Let dry completely.
(Photo 1)

2 | Make two color mixes:

Blue Mix: 1:1 Soapstone and Glazing Gel. Add a 1:1 mix of Slow Dry Fluid Acrylics Ultramarine Blue and Chromium Oxide Green.
(Photo 2)

Yellow Mix: 1:1 Soapstone and Glazing Gel. Add a very small amount of Theme Paint Transparent Yellow Oxide. Set this color aside for now.
(Photo 3)

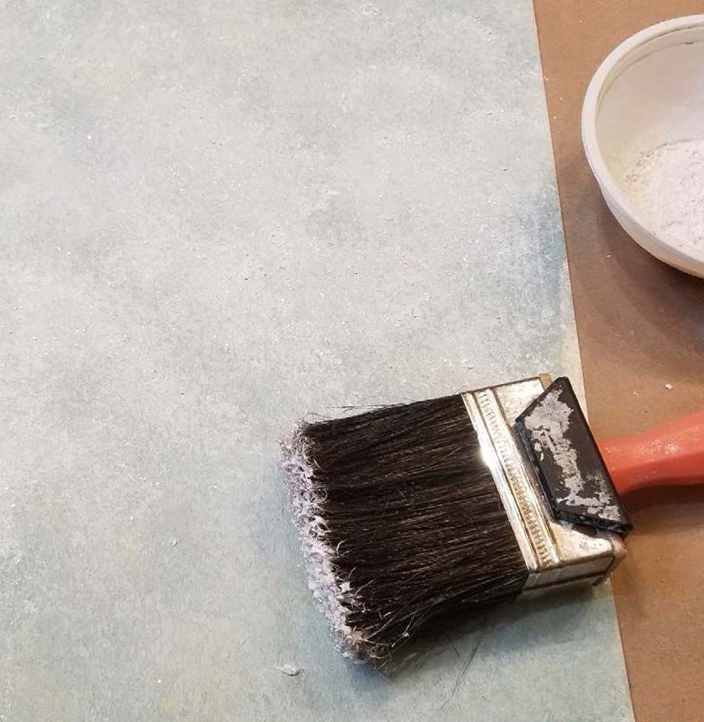
3 | Using the blue mix first, sponge on with a damp, wrung out sea sponge, and soften. Make sure not to leave sponge marks. Let dry completely. For the second layer, lightly sponge in the yellow mix at approx. 20%, creating a subtle warm toning over the blue. Let dry.
(Photo 4)

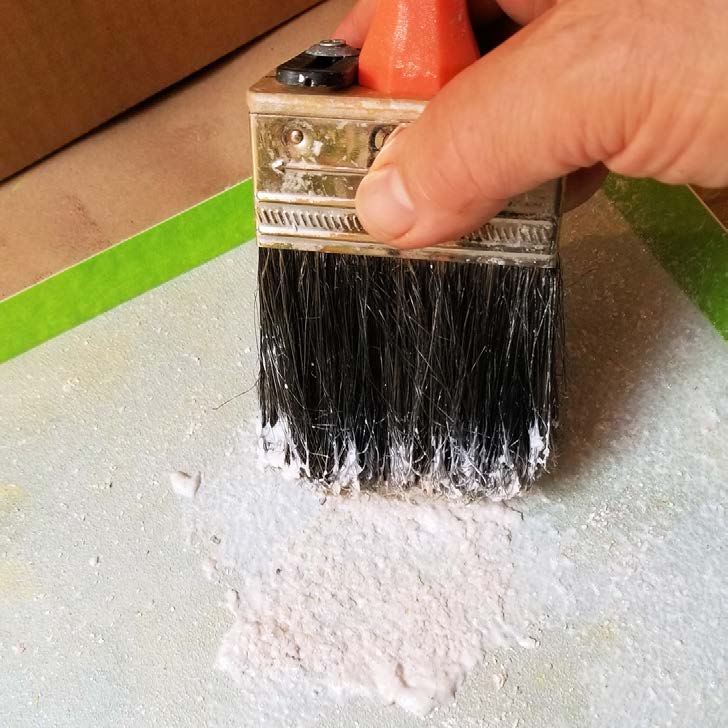
4 | Mix 50% Golden Artist Colors Pearl Mica Flakes (Small) with Metallic Textures Tint Base Pearl and 25% Glazing Gel.Pounce with the material to cover your area. Let dry.
(Photos 5-6)

5 | With the same mix as in Step 3, add a liberal amount of Large Muscovite Flakes and water to make a watery paste. Stir frequently.
(Photo 7)

6 | Pounce again, making sure you are picking up the large flakes. After it dries, repeat.

TIP: After the finish is dry, you can come back with the mix from Step 2 plus a little Slow Dry Fluid Acrylic Carbon Black to deepen the tone, as seen in Photo 8. Use sparingly.

Here is the final finish.
(Photo 8)

Decorative Finish: Misty Landscape

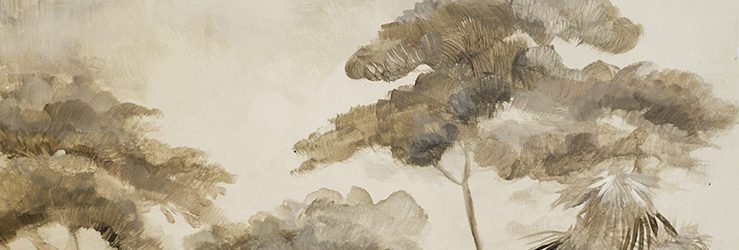
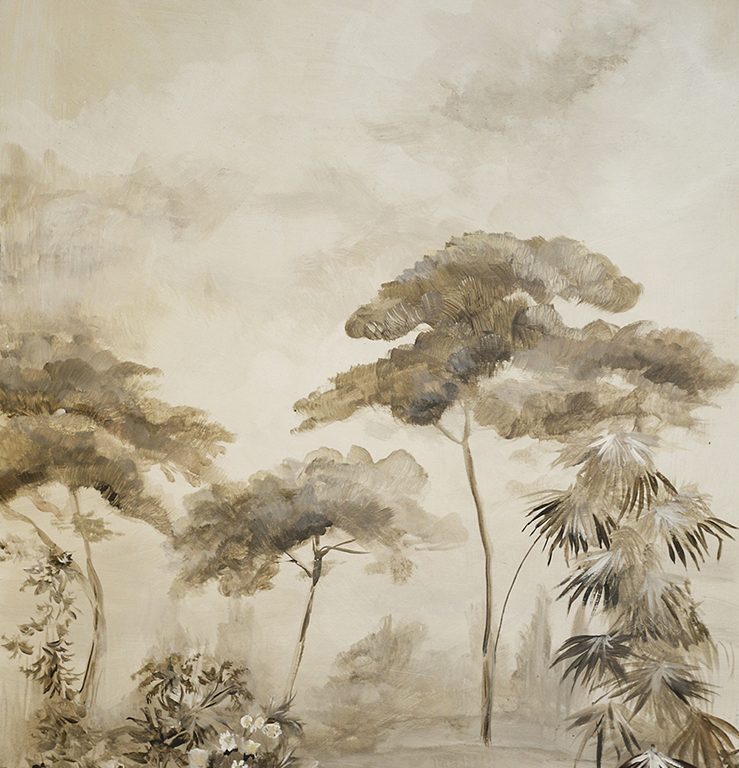
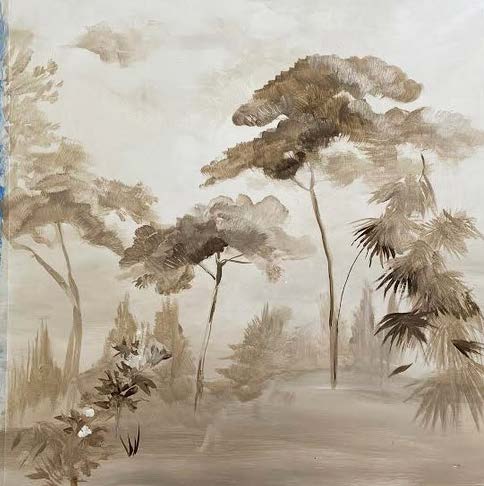
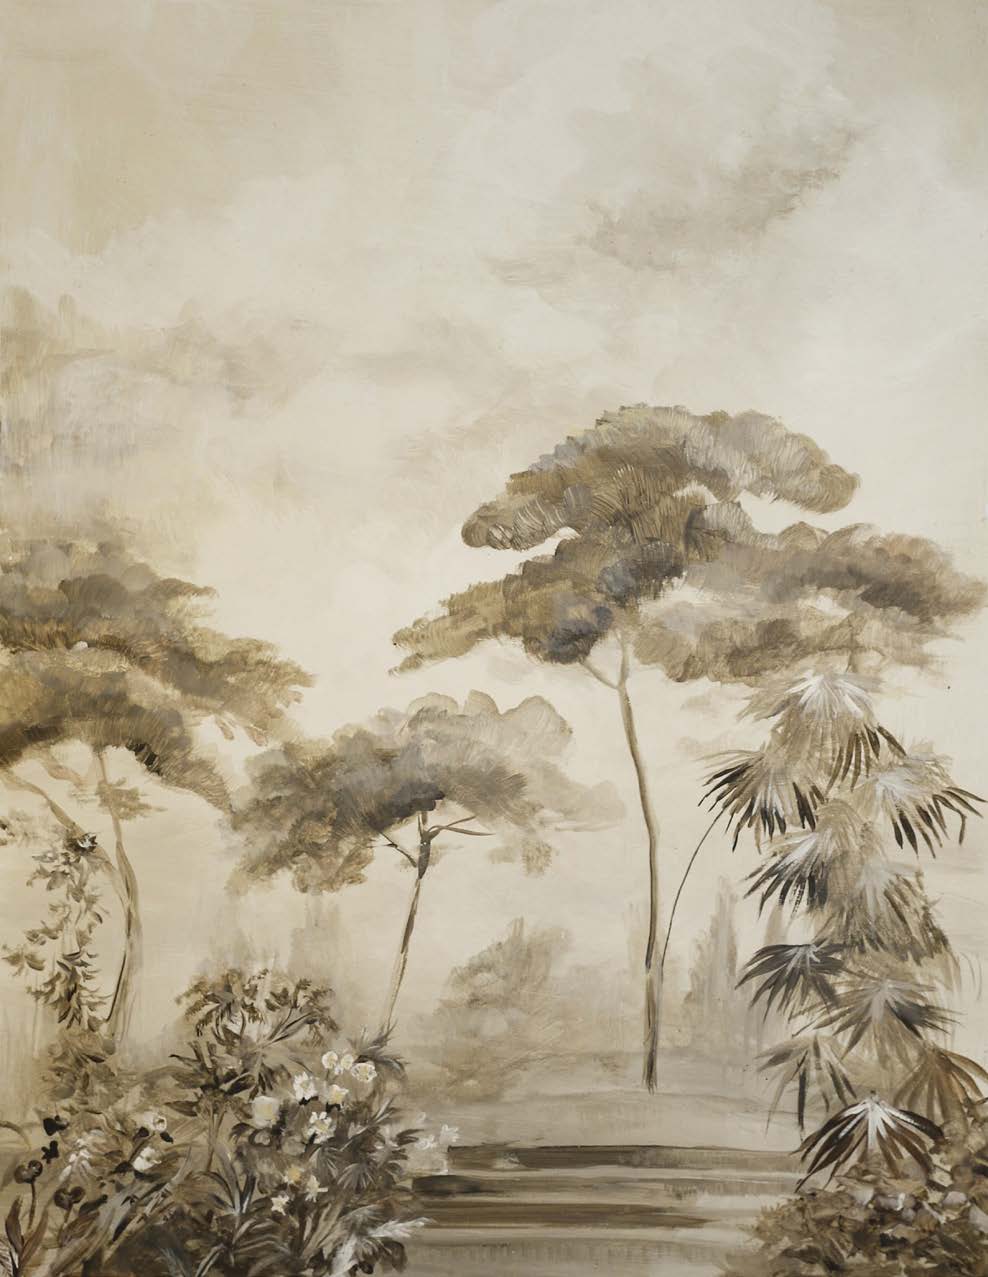
"Misty Landscape" by Cecelia Claire.
DECORATIVE FINISH HOW-TO

Misty Landscape

Artist: Cecelia Claire

Share this article

PROJECT SUPPLIES:

INSTRUCTIONS:

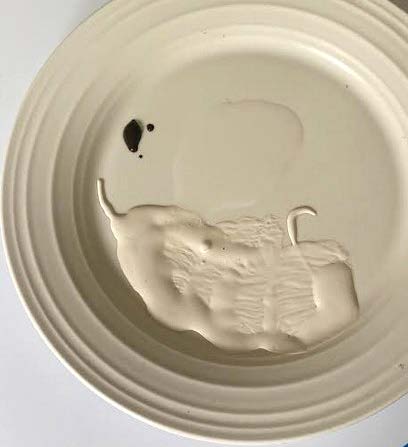
1 | Set up a palette with the latex interior paint, a dot of Slow Dry Fluid Acrylic Raw Umber, and the Glazing Medium, as pictured.
(Photo 1)

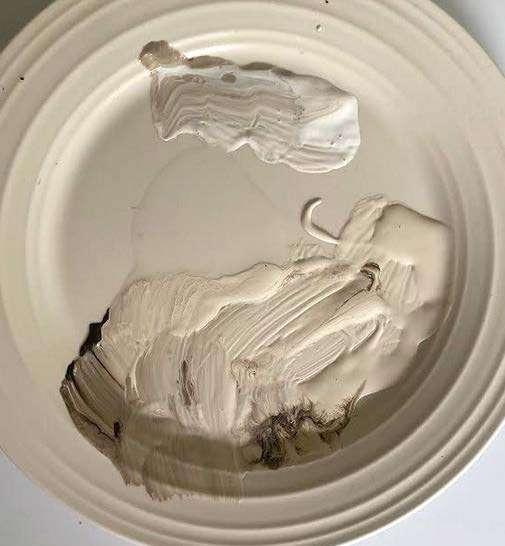
2 | Mix the Raw Umber into the interior paint and the Glazing Medium. Add Titanium White mural paint to the palette. Add Glazing Medium to the Titanium White.
(Photo 2)

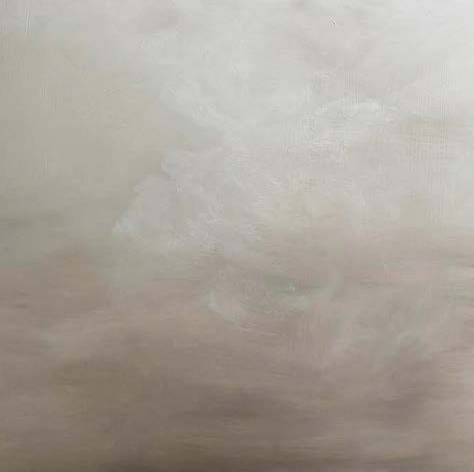
3 | On a surface primed with interior primer or gesso, create a blended gradient using a large brush, with more white and cloud shapes at the top. Blend out the edges to create a soft effect.
(Photo 3)

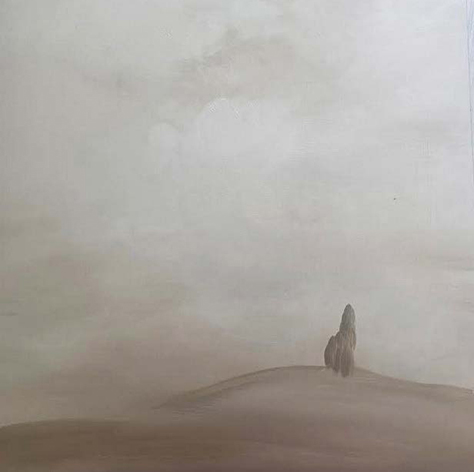
4 | Using a mid-tone blend of paints from your palette, create a foreground. Begin to create a treeline on the foreground.
(Photo 4)

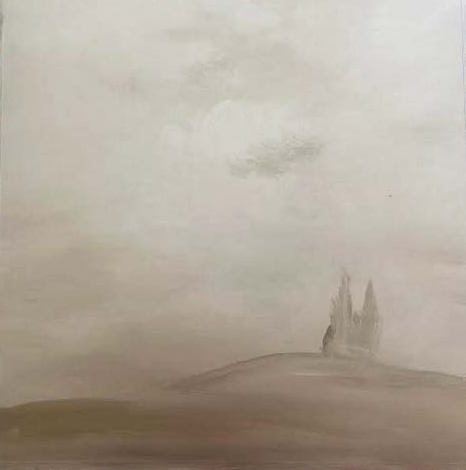
5 | Blend thin coats of darker paint mix into the clouds for shadows, and thin coats of lighter paint mix as a “mist” on the treeline.
(Photo 5)

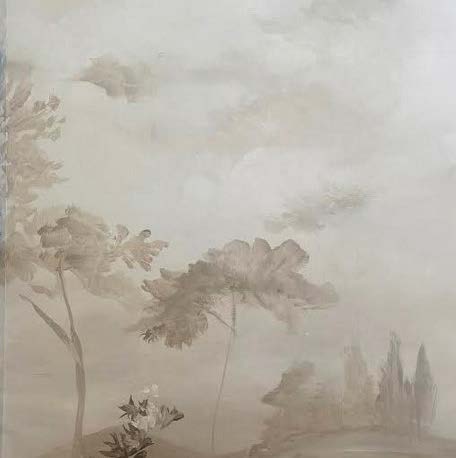
6 | Using mid-tones painted on with a round brush, continue to add detail. Extend the treeline, add middle ground trees, and foreground plants. Use more contrast as you get closer to the foreground.
(Photo 6)

7 | Continue adding detail by creating shadows from a darker paint blend, and using thin coats of a lighter paint blend with plenty of Glazing Medium to create a misty glaze.
(Photo 7)

8 | Add high-contrast foreground detail using Slow Dry Fluid
Acrylic Raw Umber and Titanium White – no blending necessary.
Here is the completed finish.
(Photo 8)

Featured Products

Cecelia Claire

About the Artist
Offering a fresh reimagining of the traditional decorative painter, Cecelia creates hypercustomized handpainted surfaces for residences, retail and hospitality. Her creations include bespoke murals and wallcoverings on a variety of substrates including silk and gold foil, as well as digitally printed wallpaper and textiles from original painted designs.

Learn more about Cecelia in our Behind the Texture artist feature series.

More from this artist

Looking for more inspiration? Click here to view all of the decorative finishes from our Limited Edition Collections.

Decorative Finish: Blue & White Magnolias

"Blue & White Magnolias" by Cecelia Claire.
DECORATIVE FINISH HOW-TO

Blue & White Magnolias

Artist: Cecelia Claire

Share this article

PROJECT SUPPLIES:

INSTRUCTIONS:

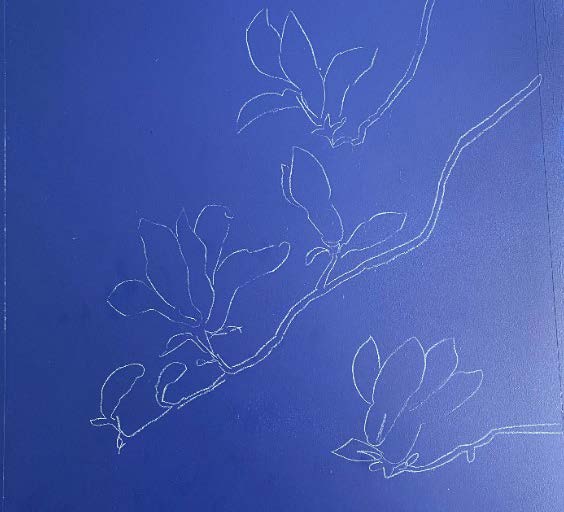
1 | On a surface primed and roller-coated with two coats of Golden Paintworks Mural & Theme Paint Royal Blue, sketch a blossom and branch design with a white chalk pencil.
(Photo 1)

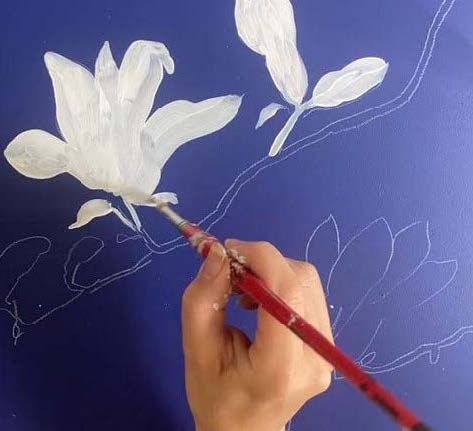
2 | Using a round brush, fill the outlines of the sketch in with Golden Paintworks Mural & Theme Paint Titanium White. Allow to dry.
(Photo 2)

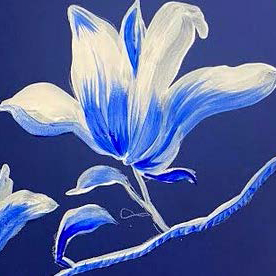
3 | Rinse and dry the round brush and use a thin coat of Slow Dry Fluid Acrylic Ultramarine Blue to create the volume and contrast of the petals.
(Photo 3)

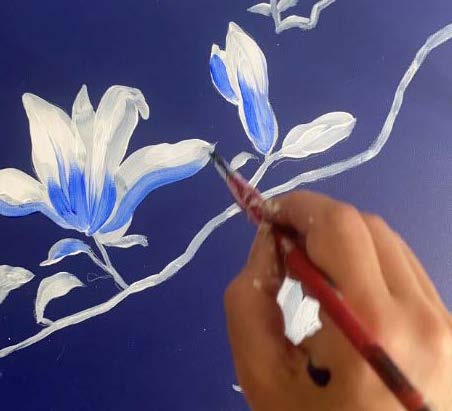
4 | Continue with a thin coat on the stems and leaves, leaving some white at the top of the shapes for contrast.
(Photo 4)

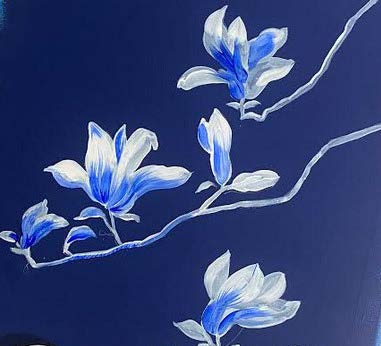
5 | Add darker, contrasting detail along the branches and petals using a narrow line of Slow Dry Fluid Acrylic Ultramarine Blue applied thickly with a liner brush. “Erase” any stray chalk lines by re-applying the Golden Paintworks Mural & Theme Paint in Royal Blue over those areas.
(Photo 5)

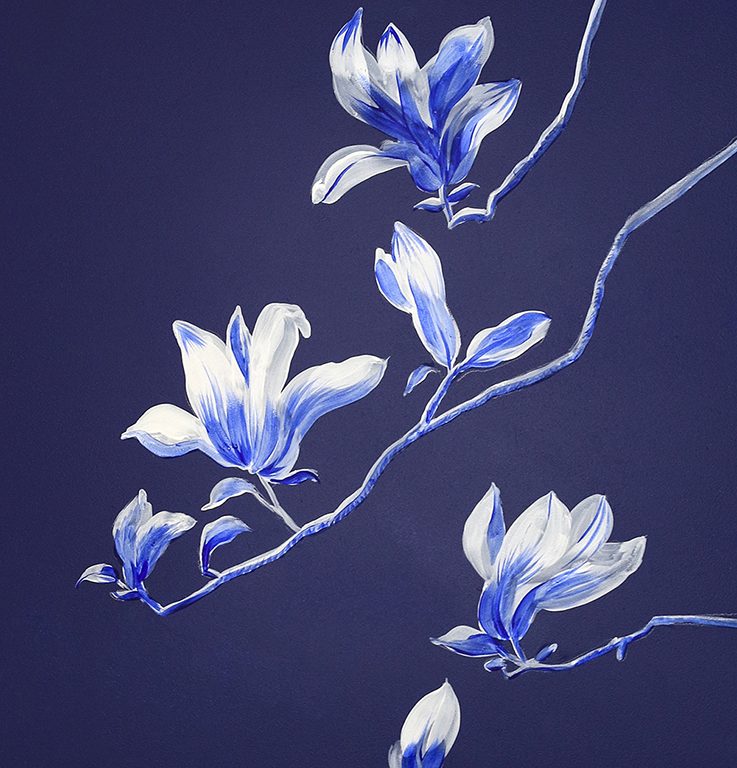
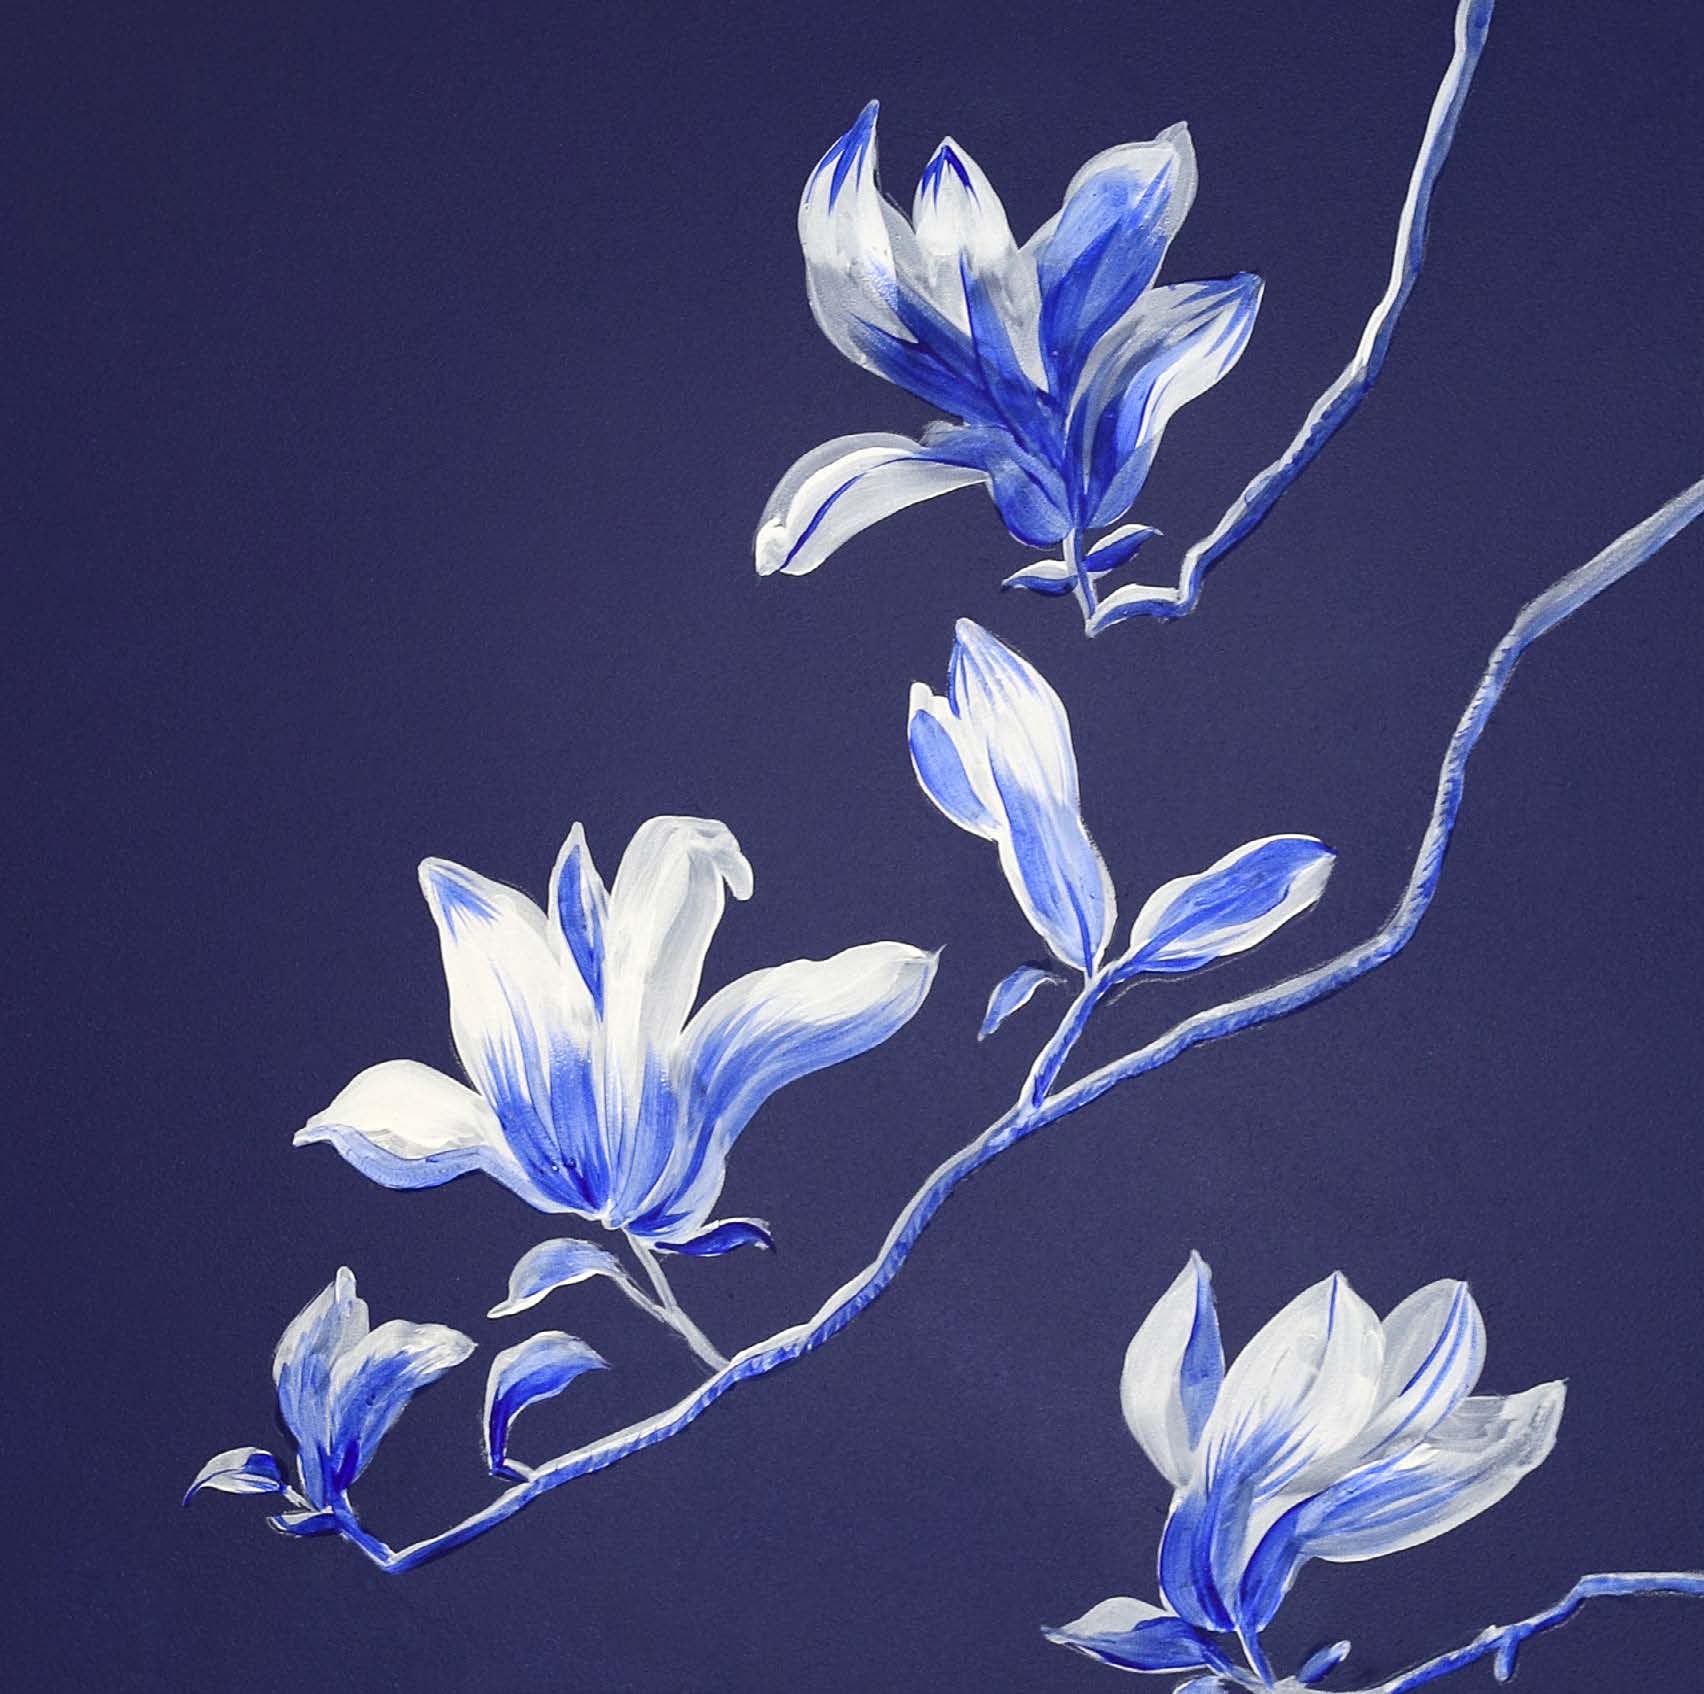
6 | Here is the completed finish.
(Photo 6)

Featured Products

Cecelia ClaireAbout the Artist
Offering a fresh reimagining of the traditional decorative painter, Cecelia creates hypercustomized handpainted surfaces for residences, retail and hospitality. Her creations include bespoke murals and wallcoverings on a variety of substrates including silk and gold foil, as well as digitally printed wallpaper and textiles from original painted designs.

Learn more about Cecelia in our Behind the Texture artist feature series.

More from this artist

Looking for more inspiration? Click here to view all of the decorative finishes from our Limited Edition Collections.

Decorative Finish: Metallic Sunset

DECORATIVE FINISH HOW-TO

Metallic Sunset

Artist: Annie Moran 

Share this article

PROJECT SUPPLIES:

INSTRUCTIONS:

1 | Prepare the wall with a slate blue colored latex paint or Payne’s Gray Mural & Theme paint added to a white latex paint to create this color.

2 | With a large brush, swirl thin patches of Titanium White Mural & Theme paint and Moody metallic paint to create areas of light and
dark sky. Feather and blend out the patches well with a dry brush.
(Photo 1)

3 | Sketch out a silhouetted landscape of your choice.
(Photo 2)

4 | Determine areas where you would like to show sunlight reflection. Use a medium sized brush to apply metallic paint in 24K Gold where sunlight reflection is desired, feathering and blending out the edges.
(Photo 3)

5 | Paint in your landscape silhouette with undiluted Payne’s Gray Mural & Theme paint.
(Photo 4)

6 | Add additional sunlight highlights in 24k Gold metallic paint where desired. Here is the completed piece.
(Photo 5)

Featured Products

Annie MoranAbout the Artist
Annie Moran is a fine artist and designer whose work celebrates the nature and culture of her native Louisiana and the Gulf Coast region. With a passion for beautiful interiors, her primary focus is in mural arts, wallpaper and textile design and watercolors. Additionally, she creates fine jewelry, accessories and apparel. Born and raised in rural Louisiana, the abundance of natural surroundings provided constant food for her imagination as a child and that love of nature continues to fuel her creativity. After working for 12 years in New York as a designer in the fashion industry, Annie is now back home in New Orleans, surrounded by the people and the landscapes that inspire her the most. Her paintings, wallpapers and murals have been featured by publications such as Garden and Gun and Southern Home and are quickly becoming favorites among collectors, interior designers and homeowners alike. To see more of Annie’s work, visit www.anniemoran.com or follow her on instagram @annie__moran.

More from this artist

Looking for more inspiration? Click here to view all of the decorative finishes from our Limited Edition Collections.

Decorative Finish: Metallic Birds

DECORATIVE FINISH HOW-TO

Metallic Birds

Artist: Annie Moran 

Share this article

PROJECT SUPPLIES:

INSTRUCTIONS:

1 | Prepare the wall with Metallic Texture Tint Base in Pink Effervescence with a trowel, using the smooth application technique.

2 | Draw silhouettes of birds in various sizes, with some overlapping and one or more at a larger scale than all the others, designated to be in the foreground.
(Photo 1)

3 | Mix Metallic Paint Tint Base Pearl with a bit of Burnt Sienna Mural & Theme paint to achieve a shimmery dark pink. Fill in the smallest of the bird silhouettes with this color.
(Photo 2)

4 | Select some of the medium sized silhouette shapes to have a glossier sheen than the others and fill in those shapes with Titanium White Mural & Theme paint. At this point you can also prime the large foreground bird(s) in white.
(Photo 3)

5 | Fill in all of the medium sized silhouettes with Just Brass metallic paint, including the ones that were primed in white. This may require two coats of paint for good coverage.
(Photo 4)

6 |  Here is the final finish.
(Photo 5)

Featured Products

Annie MoranAbout the Artist
Annie Moran is a fine artist and designer whose work celebrates the nature and culture of her native Louisiana and the Gulf Coast region. With a passion for beautiful interiors, her primary focus is in mural arts, wallpaper and textile design and watercolors. Additionally, she creates fine jewelry, accessories and apparel. Born and raised in rural Louisiana, the abundance of natural surroundings provided constant food for her imagination as a child and that love of nature continues to fuel her creativity. After working for 12 years in New York as a designer in the fashion industry, Annie is now back home in New Orleans, surrounded by the people and the landscapes that inspire her the most. Her paintings, wallpapers and murals have been featured by publications such as Garden and Gun and Southern Home and are quickly becoming favorites among collectors, interior designers and homeowners alike. To see more of Annie’s work, visit www.anniemoran.com or follow her on instagram @annie__moran.
More from this artist

Looking for more inspiration? Click here to view all of the decorative finishes from our Limited Edition Collections.

Decorative Finish: Grassy Marsh

DECORATIVE FINISH HOW-TO

Grassy Marsh

Artist: Annie Moran 

Share this article

PROJECT SUPPLIES:

INSTRUCTIONS:

1 | Prepare the wall with the latex interior paint.

2 | Mix mural paints to achieve a darker shade of green that coordinates with the latex base color.

3 | Using an angled brush and the darker green shade you’ve mixed, create shapes of grass clusters with slanted strokes in groups.
(Photo 1)

4 | With a smaller angled brush, add shadows at the base of the clusters with Payne’s Gray Mural & Theme paint.
(Photo 2)

5 | Still using the small angled brush, make strokes at the tops of the clusters with Titanium White Mural & Theme paint and Sap Green Mural & Theme paint that has been tinted with white.
(Photo 3)

6 | With a thin round brush, use Roman Gold metallic paint to create wispy flowering tips and highlights.
(Photo 4)

7 |  Here is the final finish.
(Photo 5)

Featured Products

Annie MoranAbout the Artist
Annie Moran is a fine artist and designer whose work celebrates the nature and culture of her native Louisiana and the Gulf Coast region. With a passion for beautiful interiors, her primary focus is in mural arts, wallpaper and textile design and watercolors. Additionally, she creates fine jewelry, accessories and apparel. Born and raised in rural Louisiana, the abundance of natural surroundings provided constant food for her imagination as a child and that love of nature continues to fuel her creativity. After working for 12 years in New York as a designer in the fashion industry, Annie is now back home in New Orleans, surrounded by the people and the landscapes that inspire her the most. Her paintings, wallpapers and murals have been featured by publications such as Garden and Gun and Southern Home and are quickly becoming favorites among collectors, interior designers and homeowners alike. To see more of Annie’s work, visit www.anniemoran.com or follow her on instagram @annie__moran.
More from this artist

Looking for more inspiration? Click here to view all of the decorative finishes from our Limited Edition Collections.

Decorative Finish: Forest Through the Leaves

DECORATIVE FINISH HOW-TO

Forest Through the Leaves

Artist: Annie Moran 

Share this article

PROJECT SUPPLIES:

INSTRUCTIONS:

1 | Over a wall prepared with white gloss interior latex paint, apply a thin layer of Metallic Texture Tint Base Gold with a trowel and allow to dry.

2 | Using a brush, apply the 24K Gold metallic paint over the metallic texture and cover any white that is showing through. Allow to dry.
(Photo 1)

3 | Go back over the wall with the metallic texture using a trowel, applying this second coat to most areas. Unevenly leave some areas without the second coat of metallic texture, creating a weathered or distressed antique look. Allow to dry completely.
(Photos 2-3)

4 | Make a dark green by mixing Hookers Green, Sap Green, and Burnt Sienna. Using a large filbert head paintbrush, paint a dark layer of leaves over the gold surface.
(Photo 4)

5 | Tint Hookers Green slightly with Titanium White and add a touch of Burnt Sienna to create a middle green, then paint a layer of leaves overlapping the dark layer in areas.
(Photo 5)

6 | Using Hookers Green highly tinted with white, paint a light colored layer of leaves on top, again overlapping the other layers in areas. Add highlights and shadows to leaves on the light and middle value layers as desired.
(Photo 6)

7 | Add insects, birds or other small creatures to your liking! Here is the final finish.
(Photo 7)

Featured Products

Annie MoranAbout the Artist
Annie Moran is a fine artist and designer whose work celebrates the nature and culture of her native Louisiana and the Gulf Coast region. With a passion for beautiful interiors, her primary focus is in mural arts, wallpaper and textile design and watercolors. Additionally, she creates fine jewelry, accessories and apparel. Born and raised in rural Louisiana, the abundance of natural surroundings provided constant food for her imagination as a child and that love of nature continues to fuel her creativity. After working for 12 years in New York as a designer in the fashion industry, Annie is now back home in New Orleans, surrounded by the people and the landscapes that inspire her the most. Her paintings, wallpapers and murals have been featured by publications such as Garden and Gun and Southern Home and are quickly becoming favorites among collectors, interior designers and homeowners alike. To see more of Annie’s work, visit www.anniemoran.com or follow her on instagram @annie__moran.
More from this artist

Looking for more inspiration? Click here to view all of the decorative finishes from our Limited Edition Collections.