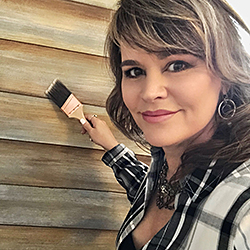
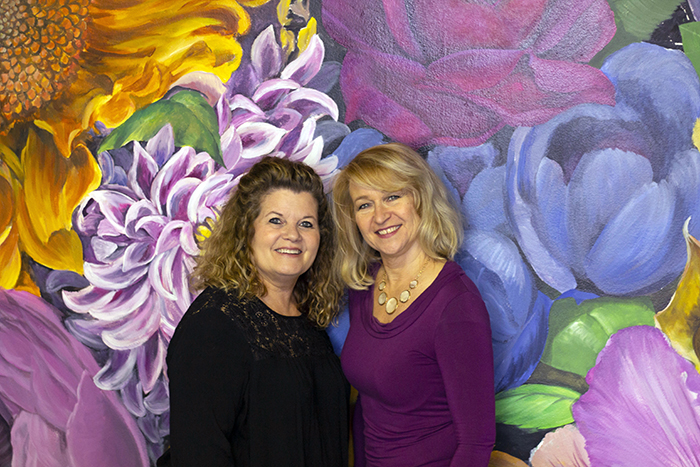
Decorative Finish: Abstract Opal

Abstract Opal decorative finish
DECORATIVE FINISH HOW-TO

Abstract Opal

Artist: Decorative & Faux Finishes

Share this article

PROJECT SUPPLIES:

INSTRUCTIONS:

1 | Basecoat in Benjamin Moore White Dove OC-17 eggshell sheen with low nap roller and let dry. Roll on the White Veil Metallic Paint with low nap roller and let dry.

2 | Mix two color glazes. First, mix your blue glaze with one part Glazing Medium to one part Phthalo Blue (Green Shade) Slow Dry Fluid Acrylics. Second, mix your green glaze with two parts Golden Paintworks Glazing Medium, one part Phthalo Blue (Green Shade) Slow Dry Fluid Acrylics, and one part Hansa Yellow Slow Dry Fluid Acrylics. Apply the blue and green glazes with a chip brush at desired opal accent areas. A diagonal movement flows nicely. Soften with Badger Brush. Let dry.
(Photo 1)

3 | Trowel the Metallic Texture Tint Base Pearl from the edge of the blue and green glaze. Trowel more on the remainder of your wall in multiple directions. Let dry.
(Photo 2)

4 | Create veins with the 24K Metallic Paint with your trim or artist brush.
(Photo 3)

5 | After everything is dry, very tightly trowel on another layer of Metallic Texture Tint Base Pearl, avoiding the gold.
(Photo 4)

Here is the final finish.
(Photo 5)

Featured Products

About the Artists
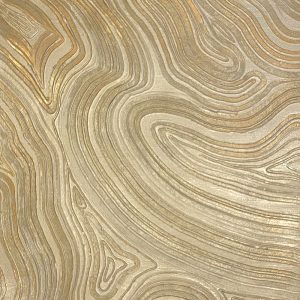
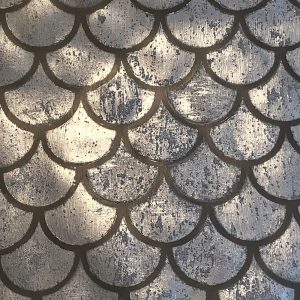
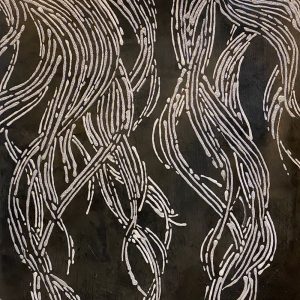
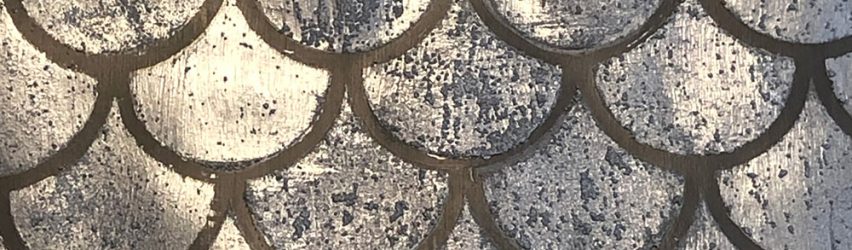
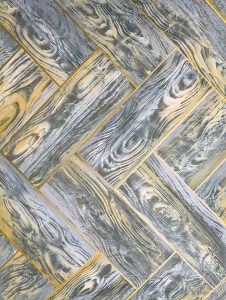
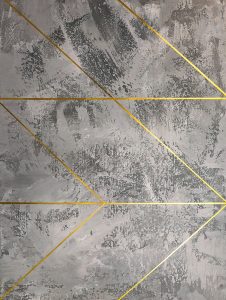
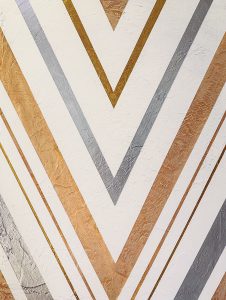
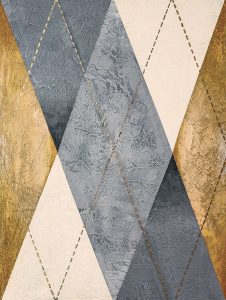
Decorative & Faux Finishes, a decorative arts team, has been in business since 1998 creating custom faux finishes and murals for homeowners, designers, businesses, and contractors in the greater Houston area and beyond. The team has studied under master artisans from all over the world. With dedication to this art, Decorative and Faux Finishes provides experience, talent, and attention to detail. While sensitive to every client’s desired style and budget, they receive the benefit of a certified professional finisher eager to create something special… just for you.

Learn more about Decorative & Faux Finishes in our Behind the Texture artist feature series.

More from this artist

Looking for more inspiration? Click here to view all of the decorative finishes from our Limited Edition Collections.

Decorative Finish: Metallic Raised Faux Bois

Metallic Raised Faux Bois decorative finish
DECORATIVE FINISH HOW-TO

Metallic Raised Faux Bois

Artist: Caroline Lizarraga

Share this article

PROJECT SUPPLIES:

INSTRUCTIONS:

1 | Basecoat with two coats of Moondust Metallic Paint. Let dry.
(Photo 1)

2 | Mix your Sandstone and White Gold Metallic Paint.
(Photo 2)

3 | Apply an even layer of Sandstone over your Moondust Metallic Paint Base with your trowel of choice. Then with a comb, pull your texture through until you are happy with your woodgrain pattern. Let dry.
(Photo 3)

4 | Mix Sheer Glazing Medium with Bright Silver Metallic Paint. Brush a thin layer over all of the design. Let dry.
(Photo 4)

Here is the final finish.
(Photo 5)

Featured Products

About the Artist
With hands permanently covered in plaster and paint, Caroline Lizarraga is happiest working in Old World ways. She trained for her craft in the cobblestoned streets of Florence, Italy, and continues to bring that antiquated sensibility to all of her projects today. You’ll find her on every job site, working each layer of color and detailing solely by hand. She’s passionate not only about creating amazing interior environments but also in helping her clients find and express their own distinctive style. No two jobs are ever alike. Whether it’s a boutique hotel in Napa Valley, an expansive winery estate, or a private residence, her approach is always the same: create a space that is utterly authentic and magically artful.

More from this artist

Looking for more inspiration? Click here to view all of the decorative finishes from our Limited Edition Collections.

Decorative Finish: Raised Metallic Mermaid Tail

Raised Metallic Mermaid Tail decorative finish
DECORATIVE FINISH HOW-TO

Raised Metallic Mermaid Tail

Artist: Caroline Lizarraga

Share this article

PROJECT SUPPLIES:

INSTRUCTIONS:

1 | Basecoat with two coats of Benjamin Moore Kendall Charcoal. Let dry.
(Photo 1)

2 | Mix the Glass Bead Gel with Slow Dry Fluid Acrylics in Carbon Black for a mid-dark gray and a bit of water to make it easier to roll.
(Photo 2)

3 | Lay your stencil pattern down and secure with tape or stencil adhesive to prevent seepage. In this case, we were going for the look of a mermaid tail, so we used a scallop pattern. Roll on a base of the tinted, thinned Glass Bead Undercoat over the stencil, ensuring it doesn’t seep under. Remove the stencil to clean it and let the pattern dry.
(Photo 3)

4 | Mix your Glass Bead Gel XL with Bright Silver Metallic Paint (60%) and Pewter Metallic Paint (40%).
(Photo 4)

5 | Brush the custom colored Glass Bead Gel XL over the pattern carefully.
(Photo 5)

6 | Dry areas before laying the stencil over the wet parts. Once done, let dry completely.
(Photo 6)

Here is the final finish.
(Photo 7)

Featured Products

About the Artist
With hands permanently covered in plaster and paint, Caroline Lizarraga is happiest working in Old World ways. She trained for her craft in the cobblestoned streets of Florence, Italy, and continues to bring that antiquated sensibility to all of her projects today. You’ll find her on every job site, working each layer of color and detailing solely by hand. She’s passionate not only about creating amazing interior environments but also in helping her clients find and express their own distinctive style. No two jobs are ever alike. Whether it’s a boutique hotel in Napa Valley, an expansive winery estate, or a private residence, her approach is always the same: create a space that is utterly authentic and magically artful.

More from this artist

Looking for more inspiration? Click here to view all of the decorative finishes from our Limited Edition Collections.

Decorative Finish: Inlay Horn

Inlay Horn decorative finish
DECORATIVE FINISH HOW-TO

Inlay Horn

Artist: Caroline Lizarraga

Share this article

PROJECT SUPPLIES:

INSTRUCTIONS:

1 | Basecoat with two coats of Benjamin Moore Rich Cream. Let dry. Measure out your pattern with a ruler. It can be as simple or as complex as you’d like. We chose a rectangle design.
(Photo 1)

2 | Mix your Slow Dry Fluid Acrylic colors with Glazing Gel. For horn, you need very earthy, natural colors. We used Carbon Black, Titanium White, Burnt Umber, Raw Umber, Raw Sienna, Yellow Oxide, and Burnt Sienna. We also keep a water spray bottle nearby to keep the materials moving.
(Photo 2)

3 | Decide which areas will be darker horn or lighter horn and tape the areas you will work on first. The low-tack tape protects the area next to it from being painted, and when repeated for the next paint area, it adds to the inlay look. If you look at horn closely, it has a natural curve, so our color layering is curved. In this photo, we are using highlights of the Burnt Sienna mix over a dry Carbon Black mix. For others, we used the Rich Cream as a base. Every color has a designated brush and there is one brush to merge each area with several colors. Once that area is dry, tape the next area, choose the colors and paint. Do the curve in another direction, so it looks inlaid. 
(Photo 3)

Here is the final finish. Enjoy!
(Photo 4)

Featured Products

About the Artist
With hands permanently covered in plaster and paint, Caroline Lizarraga is happiest working in Old World ways. She trained for her craft in the cobblestoned streets of Florence, Italy, and continues to bring that antiquated sensibility to all of her projects today. You’ll find her on every job site, working each layer of color and detailing solely by hand. She’s passionate not only about creating amazing interior environments but also in helping her clients find and express their own distinctive style. No two jobs are ever alike. Whether it’s a boutique hotel in Napa Valley, an expansive winery estate, or a private residence, her approach is always the same: create a space that is utterly authentic and magically artful.

More from this artist

Looking for more inspiration? Click here to view all of the decorative finishes from our Limited Edition Collections.

Decorative Finish: Black Venetian Plaster with Beaded Strands

Black Venetian Plaster with Beaded Strands decorative finish
DECORATIVE FINISH HOW-TO

Black Venetian Plaster with Beaded Strands

Artist: Caroline Lizarraga

Share this article

PROJECT SUPPLIES:

INSTRUCTIONS:

1 | Mix the Soapstone with the Carbon Black Slow Dry Fluid Acrylics to a solid black.
(Photo 1)

2 | Apply 3 coats of Soapstone. Burnish in between coats to increase the shine. Let dry.
(Photo 2)

3 | Rub Glazing Gel over the entire area and buff to a shine with a soft rag. Let dry.
(Photo 3)

4 | Mix two separate color batches of a) Glass Bead Gel with Silver Metallic Paint and b) Glass Bead Gel with Bright Silver Metallic Paint. We mix two to give the design dimension. Pour each color mix into separate squeeze bottles. Start piping your desired pattern of beaded strands onto the wall using a guide (such as chalk) or organically. Let dry.
(Photo 4) 

Here is the final finish.
(Photo 5)

Featured Products

About the Artist
With hands permanently covered in plaster and paint, Caroline Lizarraga is happiest working in Old World ways. She trained for her craft in the cobblestoned streets of Florence, Italy, and continues to bring that antiquated sensibility to all of her projects today. You’ll find her on every job site, working each layer of color and detailing solely by hand. She’s passionate not only about creating amazing interior environments but also in helping her clients find and express their own distinctive style. No two jobs are ever alike. Whether it’s a boutique hotel in Napa Valley, an expansive winery estate, or a private residence, her approach is always the same: create a space that is utterly authentic and magically artful.

More from this artist

Looking for more inspiration? Click here to view all of the decorative finishes from our Limited Edition Collections.

Decorative Finish: Persian Blue

Persian Blue decorative finish
DECORATIVE FINISH HOW-TO

Persian Blue

Artist: Beth Warnecke

Share this article

PROJECT SUPPLIES:

INSTRUCTIONS:

1 | Basecoat with two coats of Benjamin Moore Rustic Taupe, and let dry. Mix Weathered Granite with up to 20% water to thin for rolling. Mix to a whipped consistency. Roll on a medium even coat with the whizz roller, making sure you have stippled peaks from the rolling. Let dry.
(Photo 1)

2 | Mix each Sherwin Williams color with the Soapstone with a ratio of 4 parts Soapstone to 1 part paint. It will dry slightly lighter than the paint color. Then add 20% water to each mix to make a thick glazing material. Using chip brushes, brush on each Soapstone mixture in a vertical, organic fashion at 90% coverage.
(Photo 2)

3 | Using the neon leon brush, blend the colors together vertically then horizontally, allowing some glaze to have “threadlike” patterns. Do not over blend, leaving a bit of the original Weathered Granite peaking through. Let dry.
(Photo 3)

4 | Spray back of stencil with adhesive. After setting up, position stencil and apply foil size generously with a large stencil brush. Do not worry about bleed through. Remove the stencil and using a chip brush, wipe horizontally spreading any extra foil size into thread-like patterns. Let foil size set up and then vigorously scrub foil onto the size, making sure it gets into high dimensional stippled granite. This may require a few passes.
(Photo 4)

5 | Make a mix of Glazing Gel and the original Rustic Taupe base paint at a ratio of 4:1. Also have untinted Glazing Gel ready in a separate tray. Roll on the Rustic Taupe Glazing Gel mix and clear Glazing Gel randomly, scrubbing in with the leon neon, making sure to have organic light and darker areas of glaze. Let dry.
(Photo 5)

6 | Sand the peaks with 220 grit sandpaper (using a sander for large areas) to reveal the original untinted weathered granite.
(Photo 6)

7 | Make two mixes using the Metallic Texture Tint Base Pearl with the original Rustic Taupe paint basecoat:

a) One very light mix looking like a creamy pearl, and

b) One slightly darker, close to a light taupe.
(Photo 7)

8 | Using a steel trowel edge, chop in lines of each mixture onto the finish in an organic fashion.
(Photo 8)

9 | While still wet, pull a wallpaper brush through, giving the lines a silky thread look. Let dry.
(Photo 9)

Here is the final finish.
(Photo 10)

Featured Products

About the Artist
Beth Warnecke is the owner and artist behind Classic Creations Painting, providing beautiful wall and ceiling finishes for commercial and residential spaces in the metro St. Louis, MO area. She has a passion and love for fine finished furniture and cabinetry, which comprises half of her business. Always immersed in the latest design trends and gorgeous pictures, she considers staying up to date with the latest design trends one of her top priorities when bringing timeless beauty into clients’ homes.

Learn more about Beth in our Behind the Texture artist feature series.

More from this artist

Looking for more inspiration? Click here to view all of the decorative finishes from our Limited Edition Collections.

Decorative Finish: Ink Blot

Ink Blot paint decorative finish
DECORATIVE FINISH HOW-TO

Ink Blot

Artist: Beth Warnecke

Share this article

PROJECT SUPPLIES:

INSTRUCTIONS:

1 | Basecoat with two coats of Benjamin Moore Graytint, and let dry. Mix Sandstone with Slow Dry Fluid Acrylics in Titanium White (6:1) to lighten the gray color. Trowel on tinted Sandstone in a tight coat, allowing for some movement but leave no noticeable trowel marks. Let dry.
(Photo 1)

2 | Mark on wall with painters tape where you want the blue stenciled patterns and white stenciled patterns to go. Using chalk, chalk in a random pattern of where your blue swirls and movement will go, keeping it organic and flowing.
(Photo 2)

3 | Using the Slow Dry Fluid Acrylics, mix up a small container (1/2 cup for one feature wall) of a blue color that is pleasing to you. Have another container of pure Titanium White available.
(Photo 3)

4 | Dry stencil the round pattern motifs you want blue first. Let dry.
(Photo 4)

5 | Mix two color glaze batches:

a) The rest of the blue mixture with Glazing Medium, about 5:1 ratio; and

b) The Titanium White Slow Dry Fluid Acrylics into the Glazing Medium.

Using your artist brushes and sea sponge, apply the blue glaze to your pre-chalked areas and blend out with a damp rag and badger brush. Apply the white glaze mix above and below your blue glaze to make it an organic and soft movement of color.
(Photos 5-6)

6 | Blend with damp rags and the badger brush until it is pleasing to your eye, adding additional glaze or water where needed. Let dry.
(Photo 7)

7 | Dry stencil the white motifs using straight Titanium White Slow Dry Fluid Acrylics. Let dry.
(Photo 8)

8 | Decide where you want the white drips to come down. Brush in more white glaze to the tops of those areas and shoot with the spray bottle of water. Continue until you get the drip pattern you want. Let dry completely.
(Photo 9)

Here is the final finish.
(Photo 10)

Featured Products

About the Artist
Beth Warnecke is the owner and artist behind Classic Creations Painting, providing beautiful wall and ceiling finishes for commercial and residential spaces in the metro St. Louis, MO area. She has a passion and love for fine finished furniture and cabinetry, which comprises half of her business. Always immersed in the latest design trends and gorgeous pictures, she considers staying up to date with the latest design trends one of her top priorities when bringing timeless beauty into clients’ homes.

Learn more about Beth in our Behind the Texture artist feature series.

More from this artist

Looking for more inspiration? Click here to view all of the decorative finishes from our Limited Edition Collections.

Decorative Finish: Geometric

Geometric paint decorative finish
DECORATIVE FINISH HOW-TO

Geometric

Artist: Beth Warnecke

Share this article

PROJECT SUPPLIES:

INSTRUCTIONS:

1 | Basecoat with two coats of Benjamin Moore Dove Wing, and let dry. Mix Venetian Plaster with Cashmere Metallic Paint, adding just enough paint to soften the stark white of the plaster down to a warm creamy white.
(Photo 1)

2 | Make a sketch of the wall of how you want your random geometric shapes to look. I mimicked a wallpaper pattern that had a wide and loose harlequin pattern filled with swirls and other random marks. Draw directly on the wall with a pencil where you want your line patterns to go as this will be covered up. Trowel on a random thin to medium thickness of the Cashmere Venetian Plaster mixture. Using the torn edge of a cardboard box, scrape through the plaster where your lines were placed. Now continue to scrape any other designs you would like inside the squares (i.e. swirls, more random lines, etc.). Use sea sponges to make interesting patterns in the plaster areas. Once you have the design all etched out, let dry overnight.
(Photo 2)

3 | Using the 5-in-1 tool, scrape off any large nubbies of dried plaster. You do not want the wall smooth, but the large chunks of plaster will get in the way.
(Photo 3)

4 | Skim tightly a coat of Metallic Texture Tint Base Pearl with 100% coverage, giving a tone-on-tone look. Keep it light. Let dry.
(Photo 4)

5 | Mix Glazing Gel and Cashmere Metallic Paint (4:1) and very tightly skim trowel. Let dry.
(Photo 5)

Here is the final finish.
(Photo 6)

Featured Products

About the Artist
Beth Warnecke is the owner and artist behind Classic Creations Painting, providing beautiful wall and ceiling finishes for commercial and residential spaces in the metro St. Louis, MO area. She has a passion and love for fine finished furniture and cabinetry, which comprises half of her business. Always immersed in the latest design trends and gorgeous pictures, she considers staying up to date with the latest design trends one of her top priorities when bringing timeless beauty into clients’ homes.

Learn more about Beth in our Behind the Texture artist feature series.

More from this artist

Looking for more inspiration? Click here to view all of the decorative finishes from our Limited Edition Collections.

Decorative Finish: Beaded Brocade

Beaded Brocade decorative finish
DECORATIVE FINISH HOW-TO

Beaded Brocade

Artist: Beth Warnecke

Share this article

PROJECT SUPPLIES:

INSTRUCTIONS:

1 | Basecoat with two coats of Benjamin Moore Dove Wing, and let dry. Mix Glass Bead Undercoat with up to 20% water to thin for rolling consistency. Roll on a very thin, even coat with hairy roller. Let dry.
(Photo 1)

2 | Mix each individual color of Metallic Texture 3:1 with the Glazing Gel. Whip to a creamy consistency.

a. Dampen sea sponge roller and roll on an even but stippled coat of the Dirty Martini mix. You will see basecoat underneath, aim for 90% coverage.

b. Follow same rolling technique with the French Gold, again 70-80% coverage but allowing the Dirty Martini to show through.
(Photo 2)

c. Let these two colors set up a bit, about 10 minutes. Then, gently flatten with your flex trowel – flattening the stipples but still leaving a creamy dimension.
(Photo 3)

3 | Follow the same rolling technique with the sea sponge roller and Pearl Frost mixture when Step 2 is fairly dry. This time, you are just adding highlights with the Pearl Frost, aiming for 40-50% coverage. At this point you can also add in more French Gold. Let these two colors set up a bit then flatten softly with the flex trowel, blending and swirling the colors but keeping the colors separate from each other and not muddying them into a third color. Make sure to still see some Dirty Martini in the background. When completely dry, use the high nap roller to roll on an even coat of clear Glazing Gel. Let dry.
(Photo 4)

4 | Spray stencil adhesive to the back of your stencil and let set for 10 minutes. Position the stencil, press firmly, and then apply the Glass Bead Gel XL using an old hotel key or gift card. Using a thin card like this will give you the cleanest look when pulling thick product through a stencil.
(Photo 5)

Tip: If the glass bead gel is troweled next to any painters tape, make sure to pull your tape up before the glass bead gel dries or the glass beads may pull off when removing the tape.

Here is the final finish.
(Photo 6)

Featured Products

About the Artist
Beth Warnecke is the owner and artist behind Classic Creations Painting, providing beautiful wall and ceiling finishes for commercial and residential spaces in the metro St. Louis, MO area. She has a passion and love for fine finished furniture and cabinetry, which comprises half of her business. Always immersed in the latest design trends and gorgeous pictures, she considers staying up to date with the latest design trends one of her top priorities when bringing timeless beauty into clients’ homes.

Learn more about Beth in our Behind the Texture artist feature series.

More from this artist

Looking for more inspiration? Click here to view all of the decorative finishes from our Limited Edition Collections.

Decorative Finish: Reclaimed Herringbone

Reclaimed Herringbone by Artkeyologie
DECORATIVE FINISH HOW-TO

Reclaimed Herringbone

Artist: Artkeyologie

Share this article

INSTRUCTIONS:

1 | Apply Soapstone with a GPW Trowel and let dry.

2 | To create medium gray, mix one part Slow Dry Fluid Acrylic Carbon Black with 4 parts Slow Dry Fluid Acrylic Titanium White. Paint entire surface medium Gray and let dry.
(Photo 1)

3 | Lay out herringbone pattern with ruler and pencil.
(Photo 2)

4 | Create your color palette. Mix four parts Slow Dry Fluid Acrylic Titanium White with one part Slow Dry Fluid Acrylic Carbon Black for gray shade. Mix two parts Slow Dry Fluid Acrylic Titanium White with one part Slow Dry Fluid Acrylic Raw Sienna for caramel shade. Mix one part Slow Dry Fluid Acrylic Titanium White with four parts Slow Dry Fluid Acrylic Raw Sienna for cream color. Add one part glaze to each color.
(Photo 3)

5 | Tape every other wood plank. Take a chip brush and apply paint colors in a linear direction, allowing for dry brush look. Drag your graining tool with a slow rolling motion to create a wood grain effect. Let dry, pull tape and continue until all planks are completed.
(Photo 4)

6 | Tape for grout lines. Burnish your tape and paint area with Metallic Paint Just Brass.
(Photo 5)

7 | Let dry and pull tape to reveal your Golden Paintworks masterpiece.
(Photo 6)

Featured Products

About the Artist
Suzy Dominguez started her design career over 30 years ago. She studied graphic design in Los Angeles and London. Soon after traveling around the world with a backpack for a year, she returned to the United States with a dream. Her first business, Studio Graphics concentrated on graphic design for private businesses as well as commercial restaurants and casinos. There she segued her graphics into hand painting walls. Big advertising murals were the projects back then which quickly turned into faux finishing for private homes. Today her licensed and bonded business, Artkeyologie, is the art of soulful living through paint and design. Suzy, currently residing in Phoenix, combines her graphic skills with her hand painted wall techniques and enjoys infusing her clients’ personalities into every project. Follow her on Instagram @artkeyologie and view her work online at artkeyologie.com

More from this artist

Looking for more inspiration? Click here to view all of the decorative finishes from our Limited Edition Collections.