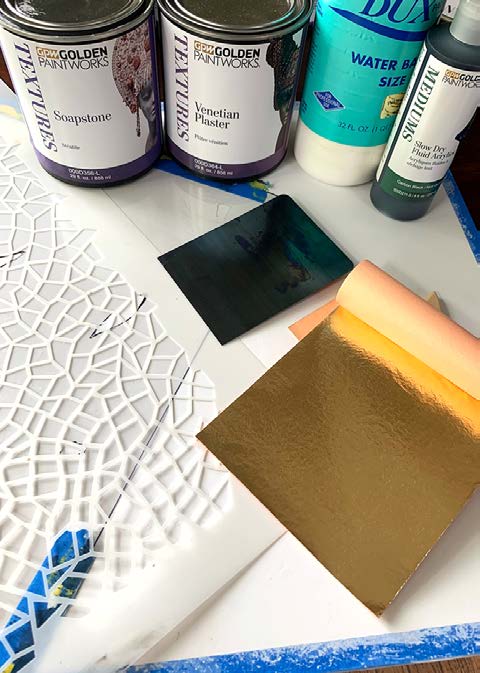
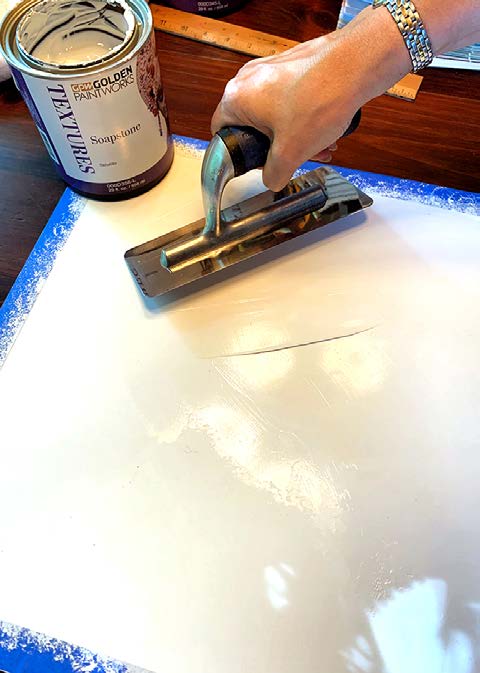
Decorative Finish: Bamboo Sunset

Bamboo Sunset by True Faux Studio
DECORATIVE FINISH HOW-TO

Bamboo Sunset

Artist: True Faux Studio

Share this article

PROJECT SUPPLIES:

INSTRUCTIONS:

1 | Base coat with Sherwin-Williams Lusty Red 6863. Let dry completely.
(Photo 1)

2 | Cut or buy circles from a masking film or frisket. You can also order custom made vinyl stencils with this pattern. We used a compass type cutter, like the Olfa Rotary Circle Cutter. Cut concentric circles with the inside diameter at 4.5″ and the outside at 6″. Lay them out on a diagonal. Place the first 4.5″ circle film and measure 10″ vertically from the circle center point, marking the next circle center point on tape to keep the surface clean. Then, from the original circle center point measure 5″ up and 5″ across at a right angle to locate the next circle center. Continue to locate the circles in your pattern.

At this point, remove the film backing and place the 4.5″ film (inner circle) on the marked tape points and place the outer ring around the inner circle.
(Photo 2)

3 | Prepare the following separately, then mix:

Glaze: 1:1 mix Golden Artist Colors Matte Medium and Clear Top Coat Dead Flat

Color: Equal parts Slow Dry Fluid Acrylics Pyrrole Red Light and Quinacridone Magenta with 25% Dioxazine Purple, and approx. 3-5% Carbon Black

4 | Test the glaze — keep it very transparent. Keep a bit of the color aside for the stenciling. Glaze over the 2-part frisket pattern and let dry completely.
(Photo 3)

TIP: If covering a large space change the glaze formula to 1:1 Glazing Medium and Sheer Glazing Medium, and let dry overnight.

5 | Leaving inside circles in place, lift the outer circles of the frisket pattern. Glaze over the entire surface again. Let dry.
(Photos 4-5)

6 | To finish, we made a 2-part bamboo stencil. You can also purchase one from your favorite stencil brand. For the color, we used the color from Step 3 and added approx. 20% more Slow Dry Fluid Acrylic Carbon Black. Add 50% Golden Artist Color Matte Medium to this mix. Roll with a 4″ foam roller, being careful not to let the material seep under the stencil.
(Photo 6)

7 | Let dry completely. Here is the final finish.
(Photo 7)

Featured Products

About the Artists
True Faux Studio owners Ginger Andro and Chuck Glicksman are fine artists who’ve studied decorative painting at the School of Visual Arts, Parsons School of Design, and with European masters. True Faux Studio specializes in mural painting and design, faux marble painting, faux wood graining, stencil design, glazing, and gilding for homes and sacred spaces.

More from this artist

Looking for more inspiration? Click here to view all of the decorative finishes from our Limited Edition Collections.

Decorative Finish: White and Gold Botanical

White and Gold Botanical by Carmen Lomax
DECORATIVE FINISH HOW-TO

White and Gold Botanical

Artist: Carmen Lomax

Share this article

PROJECT SUPPLIES:

INSTRUCTIONS:

1 | Prep your surface with Sherwin-Williams Caviar 6990, and let dry. Then, roll on the Metal Leaf Adhesive Size. I chose to use a roller with a little nap for the sizing so that the transfer wasn’t perfect and showed some irregularities from the black underneath.
(Photos 1-2)

2 | Transfer your Champagne Foil with your preferred foil applicator once the sizing is tacky.
(Photo 3)

3 | Then, I went in with whatever I thought would give some interesting variety in line quality with the Slow Dry Fluid Acrylic Carbon Black. Here, I used a decorative roller and the Ralph Lauren teeth tool.
(Photos 4-6)

4 | I also used a shaper just to freehand some movement with some diagonal lines. This could be an interesting finish just as is but wait, here comes the fun part!
(Photos 7-8)

5 | Select a variety of leaves in your environment and lightly spray with some spray adhesive. A little goes a long way.
(Photo 9)

Set your foliage artfully on your gold base and very delicately using a flat 2-3 inch rubber wedge, force the Soapstone over your greenery.
(Photos 10- 11)

6 | Remove foliage. Be aware not to wait too long to remove or the leaves will dry with the product and it will become harder to remove. Let dry completely.
(Photo 12)

Here is the finished texture.
(Photo 13)

Featured Products

About the Artist
Carmen Lomax specializes in creative wall finishes for home decor, children’s rooms and commercial and residential spaces. She works directly with homeowners and business-owners, as well as help develop projects for interior designers, architects, and commercial developers. Design options range from wall finishing and texturing to thematic murals, ceilings and three-dimensional artwork. Absolutely any hand-painted technique can be incorporated, from loose and whimsical to fine art detail and photo-realism.
More from this artist

Looking for more inspiration? Click here to view all of the decorative finishes from our Limited Edition Collections.

Decorative Finish: Summer Confection

Summer Confection by Carmen Lomax
DECORATIVE FINISH HOW-TO

Summer Confection

Artist: Carmen Lomax

Share this article

PROJECT SUPPLIES:

INSTRUCTIONS:

1 | Mix the Venetian Plaster with the desired Slow Dry Fluid Acrylics Magenta coloration you like, keeping in mind that Venetian Plaster dries lighter. I would go just a shade darker than what you think you will need. Then, proceed with two coats of the Magenta Venetian Plaster as a base. Let dry.
(Photos 1-2)

2 | Mix three values of Slow Dry Fluid Acrylics into the Glazing Medium in three separate containers. I decided to use two values for the Magenta (a medium and a dark with a bit of Carbon Black) and then a Yellow Oxide coloration.
(Photo 3)

3 | Take a damp cloth and lightly dampen the Venetian Plaster base before starting to blend in your glaze colors, blending with a dabbing motion as well as side to side blending.
(Photos 4-5)

4 | Let dry while you prepare your stencil or template.
(Photo 6)

5 | At this point in the process, a stencil or vinyl could be used, but for sample purposes, I cut my own stencil. I lightly dabbed in the color glazes from Step 2, off loading on a separate towel if the color got too heavy.
(Photo 7)

6 | Once the graphic pattern was finished, I went back over the entire sample with more magenta and yellow glaze just to set the pattern back a bit. Here is the finished texture.
(Photo 8)

Featured Products

About the Artist
Carmen Lomax specializes in creative wall finishes for home decor, children’s rooms and commercial and residential spaces. She works directly with homeowners and business-owners, as well as help develop projects for interior designers, architects, and commercial developers. Design options range from wall finishing and texturing to thematic murals, ceilings and three-dimensional artwork. Absolutely any hand-painted technique can be incorporated, from loose and whimsical to fine art detail and photo-realism.
More from this artist

Looking for more inspiration? Click here to view all of the decorative finishes from our Limited Edition Collections.

Decorative Finish: Retro Maze

Retro Maze by Carmen Lomax
DECORATIVE FINISH HOW-TO

Retro Maze

Artist: Carmen Lomax

Share this article

PROJECT SUPPLIES:

INSTRUCTIONS:

1 | Prep in a solid latex black, here I used Sherwin-Williams Caviar 6990. Using the Soapstone, disperse the product in two containers and mix two complimentary values using the Slow Dry Fluid Acrylic Titanium White and Carbon Black to obtain two nice grays. (Ahh the versatility of Soapstone, have I mentioned I love this product!).
(Photo 1)

2 | Start laying on your two colors vertically simultaneously with a spatula.
(Photo 2)

Then, while still wet, I took my decorative weave pattern roller to add in a little texture. Move on to the next step while still wet.
(Photo 3)

3 | Allow the Soapstone to set up, and with the side of your trowel, slightly knock down some of the texture in places.
(Photo 4)

In hindsight, I wish I had left more of this texture to shine through, but remember, this is an art not a science, so it is up to the creator as to the look you would like to achieve. I then went over very lightly with more of both color mixtures in places.
(Photo 5)

4 | If this finish were to be done in a larger area, a stencil would improve production of the finish. For smaller more intimate areas, this technique should suffice. With this pattern, two different sizes of our graphic motif had to be drawn out (alternating with each new vertical row). The templates were cut out of styrene board.
(Photo 6)

5 | Outline your templates and vary between the white pen and the gold pen until the pattern is complete.
(Photo 7)

6 | Once dry, lightly sand the pattern with a medium grit sandpaper. I then finished with some additional sandstone, light gray mixture, over top the pattern in a couple of places.

Here is the final finish.
(Photo 8)

Featured Products

About the Artist
Carmen Lomax specializes in creative wall finishes for home decor, children’s rooms and commercial and residential spaces. She works directly with homeowners and business-owners, as well as help develop projects for interior designers, architects, and commercial developers. Design options range from wall finishing and texturing to thematic murals, ceilings and three-dimensional artwork. Absolutely any hand-painted technique can be incorporated, from loose and whimsical to fine art detail and photo-realism.
More from this artist

Looking for more inspiration? Click here to view all of the decorative finishes from our Limited Edition Collections.

Decorative Finish: Contemporary Mountainscape

Contemporary Mountainscape by Carmen Lomax
DECORATIVE FINISH HOW-TO

Contemporary Mountainscape

Artist: Carmen Lomax

Share this article

PROJECT SUPPLIES:

INSTRUCTIONS:

1 | Roll your surface with a neutral off white base coat and let dry. Proceed with one coat layered in with your trowel horizontally with Metallic Texture Tint Base Gold. It will appear uneven in terms of light areas and coverage but the lighter base coat telepathing through will give some nuance to your sections. Let dry.
(Photos 1-2)

2 | Skim coat Soapstone evenly over the Metallic Textures Tint Base Gold horizontally. Let dry.
(Photo 3)

3 | For your next step, you can always use stencil mylar, but here I used some drafting vellum because it is slightly thinner and easier to cut, plus you can sketch on it. Lay out and cut your mountainscapes, noting which sections are slated for the lighter Weathered Granite.
(Photos 4-5)

4 | Expose the first section to be treated. Next, prepare some Glazing Medium with Slow Dy Fluid Acrylic Raw Umber, not too dark, just enough to give some interest to our gold. Blend horizontally. Let dry.
(Photos 6-7)

5 | Cover the areas you just completed once dry, now exposing the areas to be done in Weathered Granite.
(Photo 8)

Here, I used a rubber blade but any spatula would do to trowel on the Weathered Granite.
(Photo 9)

While still wet, follow with a teeth tool and drag through horizontally.
(Photo 10)

Remove the acetate or vellum. Let dry.
(Photo 11)

6 | Using your same Raw Umber glazing solution from Step 4, add drop shadows and blend under each section.
(Photo 12)

And lastly, thinning out your umber solution a little more, add and wipe off with a damp cloth so that a little of that same color gets in the creases on your granite sections, tying everything together. Let dry completely.
(Photo 13)

Here is the finalized texture.
(Photo 14)

OPTION: I’ve also included another colorway in gray, so that you can see the versatility in tones.
(Photo 15)

Featured Products

About the Artist
Carmen Lomax specializes in creative wall finishes for home decor, children’s rooms and commercial and residential spaces. She works directly with homeowners and business-owners, as well as help develop projects for interior designers, architects, and commercial developers. Design options range from wall finishing and texturing to thematic murals, ceilings and three-dimensional artwork. Absolutely any hand-painted technique can be incorporated, from loose and whimsical to fine art detail and photo-realism.
More from this artist

Looking for more inspiration? Click here to view all of the decorative finishes from our Limited Edition Collections.

Decorative Finish: Wave

Wave by Arteriors
DECORATIVE FINISH HOW-TO

Wave

Artist: Arteriors

Share this article

PROJECT SUPPLIES:

INSTRUCTIONS:

Introduction: Iridescent blue waves play with light and pattern in this finish made from decorative plasters and metallic paint. This is an advanced finish, but if you love a good challenge that yields beautiful results, give this a try! If you do not know how to trowel, watch the Golden Paintworks tutorials on application methods for Venetian Plaster on their website.

1 | Prime the surface and allow to dry completely. Mix Venetian Plaster to Benjamin Moore Seaside Blue 2054-50, or color of your choice. Venetian Plaster colors can be tinted by your local Golden Paintworks retailer, or simply by tinting your own to taste. Trowel the plaster in a relatively thick layer.
(Photos 1-2)

2 | In up to 2′ x 2′ sections using a rubber wood graining comb, create a pattern by dragging the tool through the wet Venetian Plaster. Be creative and experiment on a separate board with wave shapes. Wipe excess plaster from the tool with a rag as you work. Move to the next section and repeat. Try to keep a wet edge between sections. Let dry.
(Photos 3-4)

3 | Wearing a dust mask, sand lightly with 220 grit sandpaper.
(Photo 5)

4 | Mix Venetian Plaster to Benjamin Moore Caribbean Blue Water 2055-30 or color of choice, and trowel over entire wave surface, filling in all the grooves left from the first combing layer. Scrape the surface with the edge of the trowel to keep the high points of the combed layer showing through the first layer. Let dry.
(Photos 6-7)

5 | Wearing a dust mask sand lightly with 220 grit sandpaper.
(Photo 8)

6 | Mix two parts Glazing Gel with one part Pre-Mixed Metallic Paint Reflection.
(Photo 9)

Paint over the entire surface with a brush.
(Photo 10)

While paint is still wet, scrape the entire surface with the edge of the trowel, wiping it off with a damp rag occasionally, to expose high points of wave pattern. Let dry completely.
(Photo 11)

7 | Wearing a dust mask, sand the surface with 220 grit sandpaper to expose the pattern.
(Photo 12)

If using a power tool, be gentle and do not sand too much at once or too fast. Using a sander with a vacuum attachment such as Festool Dust Extractor with a HEPA filter is the best kind of tool to use. Then sand lightly with 400 grit sand paper, then 600 to smooth and shine the high points. Burnish with a trowel. Wipe off surface. You are finished! 

Here is the finalized texture.
(Photo 13)

Featured Products

About the Artists
Amiel and Stephanie Mesner are a husband-and-wife team of fine artists who turned their love and knowledge of the fine and decorative arts into a company with over thirty-five years of experience, creating custom surface designs for the architectural and interior design industry. Arteriors, based in Natick, MA, handles professional design projects from idea and design creation through to finished application in a versatile, detail-oriented, expert manner. Dedicated to using eco-friendly decorative paint and plaster materials that are not only beautiful when applied, but responsible, Arteriors applies water-based paints and lime-based plasters, such as Venetian plasters, and American clay surface finishes which are safe, natural, and sustainable and can improve indoor air quality. 

More from this artist

Looking for more inspiration? Click here to view all of the decorative finishes from our Limited Edition Collections.

Decorative Finish: Rusted Steel with Rivets

Rusted Steel With Rivets by Arteriors
DECORATIVE FINISH HOW-TO

Rusted Steel with Rivets

Artist: Arteriors

Share this article

PROJECT SUPPLIES:

INSTRUCTIONS:

Introduction: Choose this finish if you are looking for a “WOW” surface design with an industrial chic appeal. The Golden Paintworks products used create an extremely realistic faux rusted steel finish. Because the results are fairly easy to achieve, this is both fun to do and to show!

1 | Prime and then base coat with flat black acrylic house paint. Allow to dry completely.
(Photo 1)

2 | Trowel over black base coat with the Metallic Texture Pearl Base tinted to a color similar to Benjamin Moore Whale Grey 2134-40. You can have it tinted by your local Golden Paintworks retailer or use either the Metallic Textures Pre-Tinted Silver Mule or Wrought Iron colors. If you are not an experienced Metallic Texture applicator, refer to Golden Paintworks instructional video for Metallic Texture on their website. Let dry. Repeat this step over the first Metallic Textures trowel base, using the same tinted Metallic Texture Pearl Base. Let dry completely.
(Photos 2-4)

3 | Mix or have tinted three containers of flat acrylic house paint in these Benjamin Moore colors: Rustic Brick 2091-20, Grizzly Brown Bear 2111-20 and Bronze Tone 2166-30. Mix one part Rustic Brick with one part Clear Topcoat Dead Flat. Very small amounts are needed.
(Photo 5)

Pour a small amount, approximately 1/8 cup of the rust color onto a flat surface and tap one side of damp sea sponge into the wet paint. Apply one color at a time using the sea sponge. Tap an organic, random pattern over the surface, leaving approximately 50% of open areas. Put very little paint on the sea sponge, using only one side of the sponge. Don’t overdo it. Soften immediately with the back, clean side of the sponge. Rinse sea sponge in water, wring out and apply second and third colors in the same manner, softening each color as you go. Repeat until they look like rust spots.
(Photos 6-7)


4 | Dry brush by dipping the tip of a paint brush into the Pre-Mixed Metallic Paint Pewter and brushing excess paint off onto a cotton rag. Then lightly brush over entire surface in crisscross brushstrokes. Err on the side of less with this step so as not to bury the rust colors.
(Photos 8-9)

5 | Establish where your source of light is coming from to create the trompe l’oeil rivets and sheet metal edges. In our case, it’s coming from the top right. All shadow is going to go away from the light to bottom left. We will call the top right the light side and the bottom left the shadow side. Using a straight edge level, draw in pencil where your seams between the metal sheets are going to be.
(Photo 10)

With a pointed artist brush, paint over the pencil marks in the flat black paint. While the black painted line is still wet, soften with a damp rag on the shadow side.
(Photo 11)

6 | Use a rivet stencil with ¾” diameter circles on one line, 1 ½- 2″ apart, or draw and cut your own stencil pattern from mylar. Place the stencil of the row of circles approximately 1 ½” distance from the seam and parallel to the seam. Hold the stencil in place with the low-tack painter’s tape.
(Photo 12)

Pour a small amount of the flat black paint used for the base coat onto a flat surface. Dab a stencil brush or piece of upholstery foam into the black paint, tap off onto a rag so that application is fairly dry and then dab the applicator over the circular holes until they are solid black. Remove the stencil immediately and while still wet soften the shadow side with a damp rag. Let dry.
(Photo 13)

7 | Place stencil again on the holes. Move the stencil up a little towards the light side. You will see a moon shape inside the stencil. Stencil with the Pre-Mixed Metallic Paint Pewter. Let dry.
(Photo 14)

8 | To create a highlight on the rivet, use a pointed art brush and paint a half moon shape with Pre-Mixed Metallic Paint Bright Silver on the side with the light source. With a damp rag, wipe a bit of the Bright Silver to soften towards the middle of the rivet. Let dry. With an art brush, apply a rivet shadow by painting a half a moon shape with flat black on the shadow side. Soften towards the middle of the rivet. Let dry.
(Photos 15-16)

Here is the completed texture.
(Photo 17)

Featured Products

About the Artists
Amiel and Stephanie Mesner are a husband-and-wife team of fine artists who turned their love and knowledge of the fine and decorative arts into a company with over thirty-five years of experience, creating custom surface designs for the architectural and interior design industry. Arteriors, based in Natick, MA, handles professional design projects from idea and design creation through to finished application in a versatile, detail-oriented, expert manner. Dedicated to using eco-friendly decorative paint and plaster materials that are not only beautiful when applied, but responsible, Arteriors applies water-based paints and lime-based plasters, such as Venetian plasters, and American clay surface finishes which are safe, natural, and sustainable and can improve indoor air quality. 

More from this artist

Looking for more inspiration? Click here to view all of the decorative finishes from our Limited Edition Collections.

Decorative Finish: One Thousand Flowers

One Thousand Flowers by Arteriors
DECORATIVE FINISH HOW-TO

One Thousand Flowers

Artist: Arteriors

Share this article

PROJECT SUPPLIES:

INSTRUCTIONS:

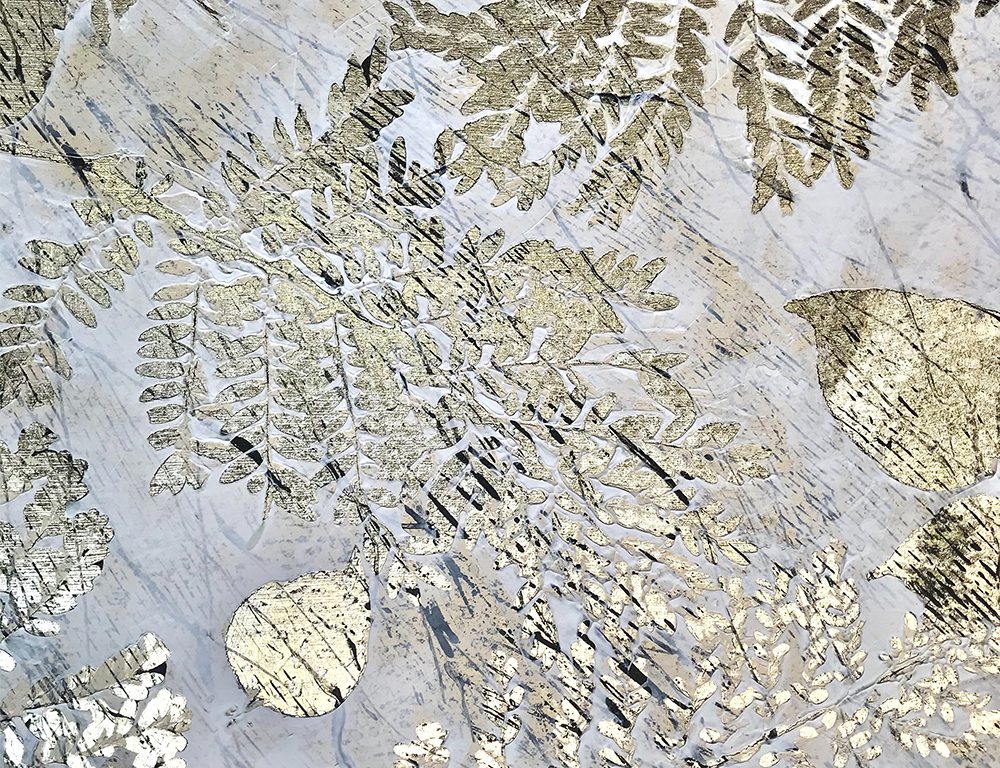
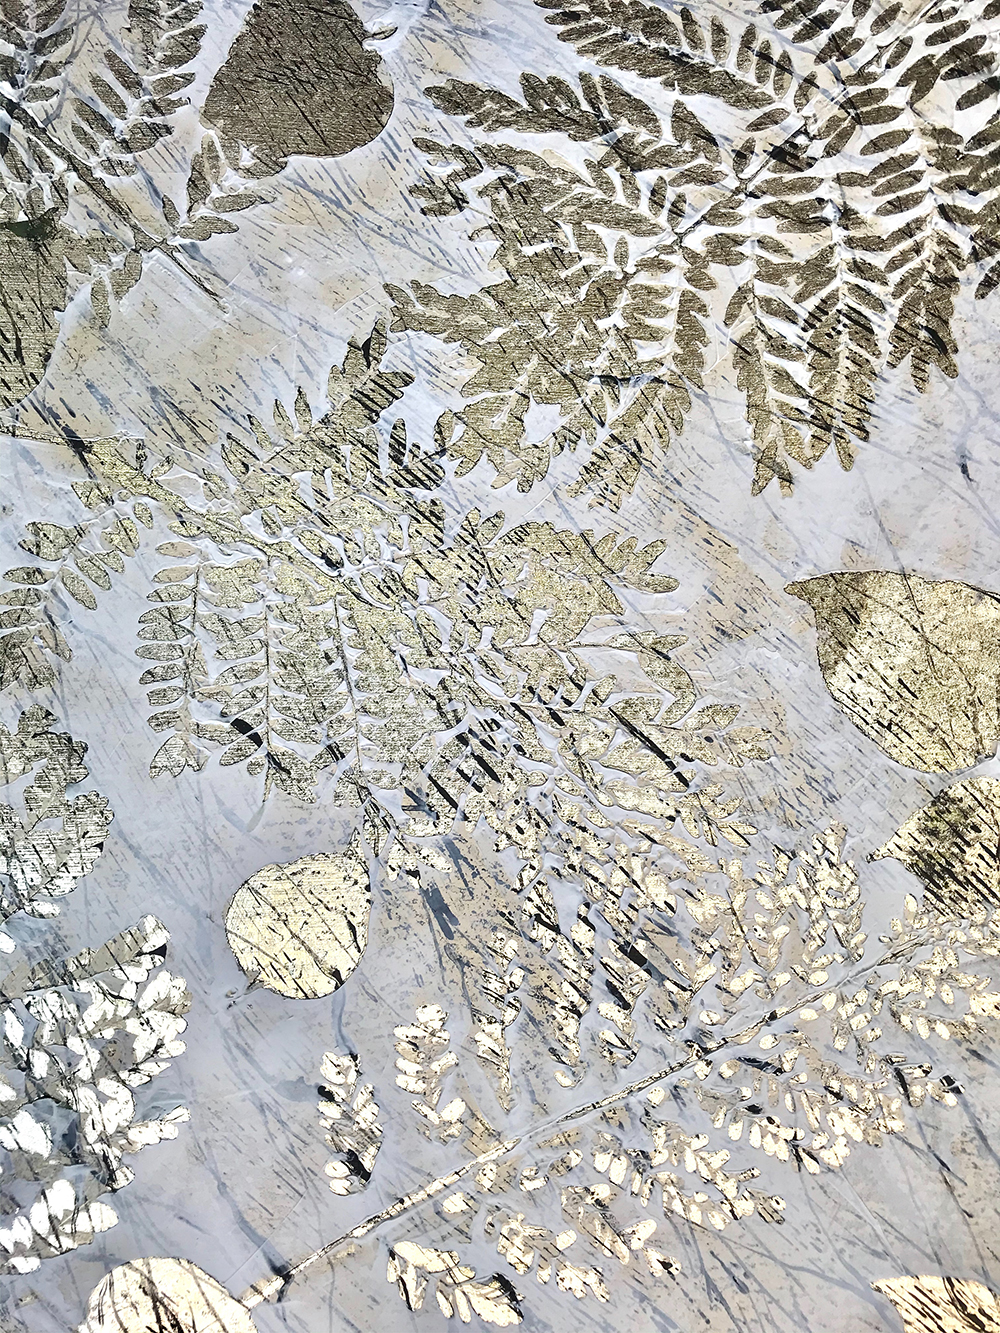
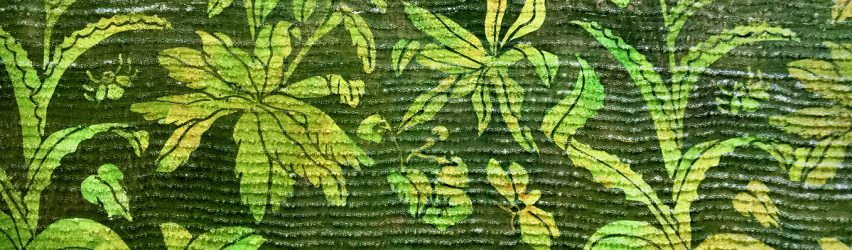
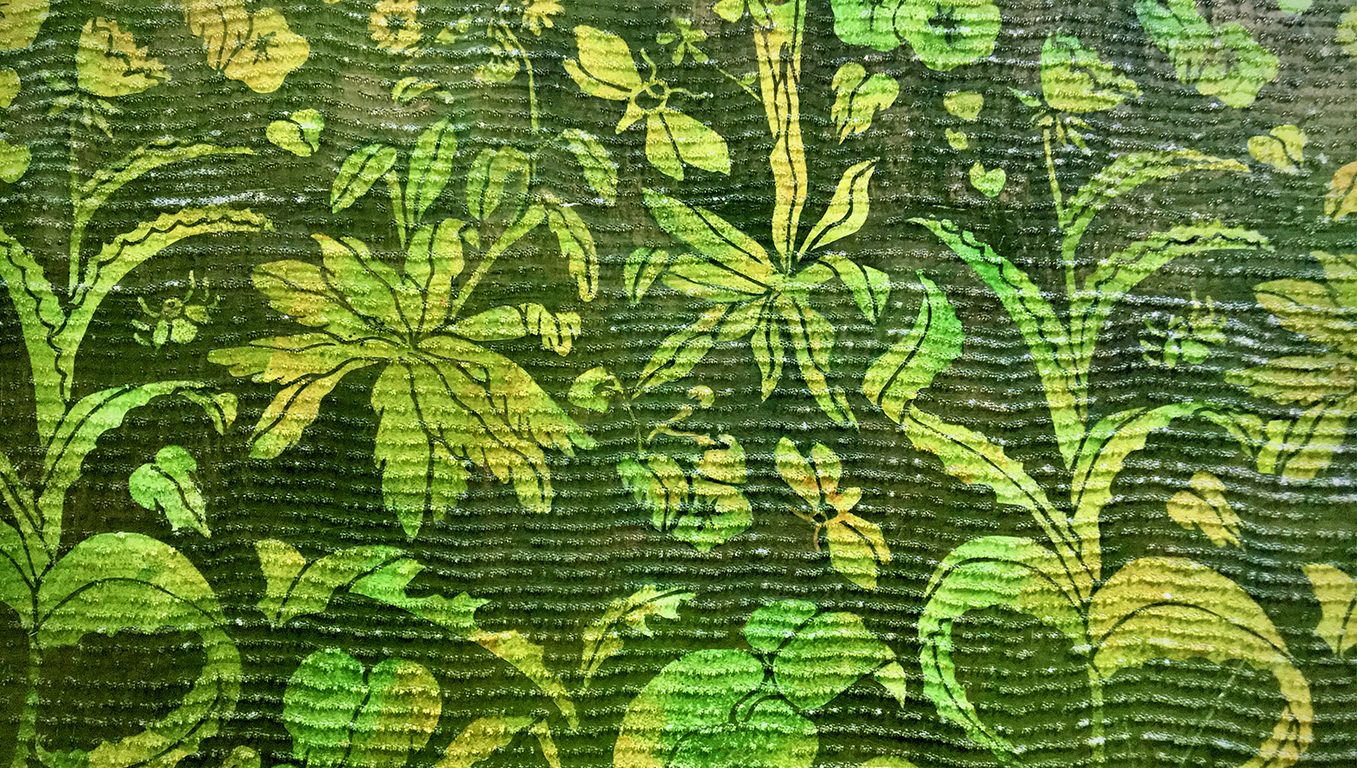
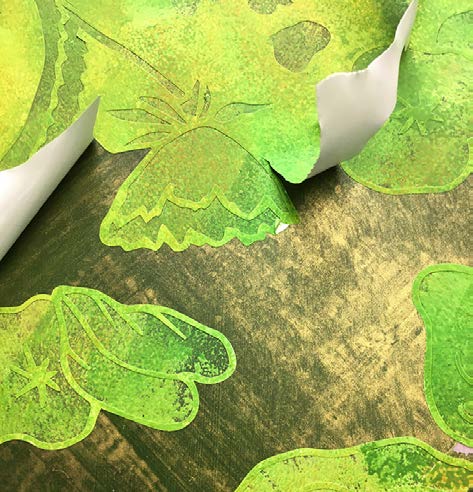
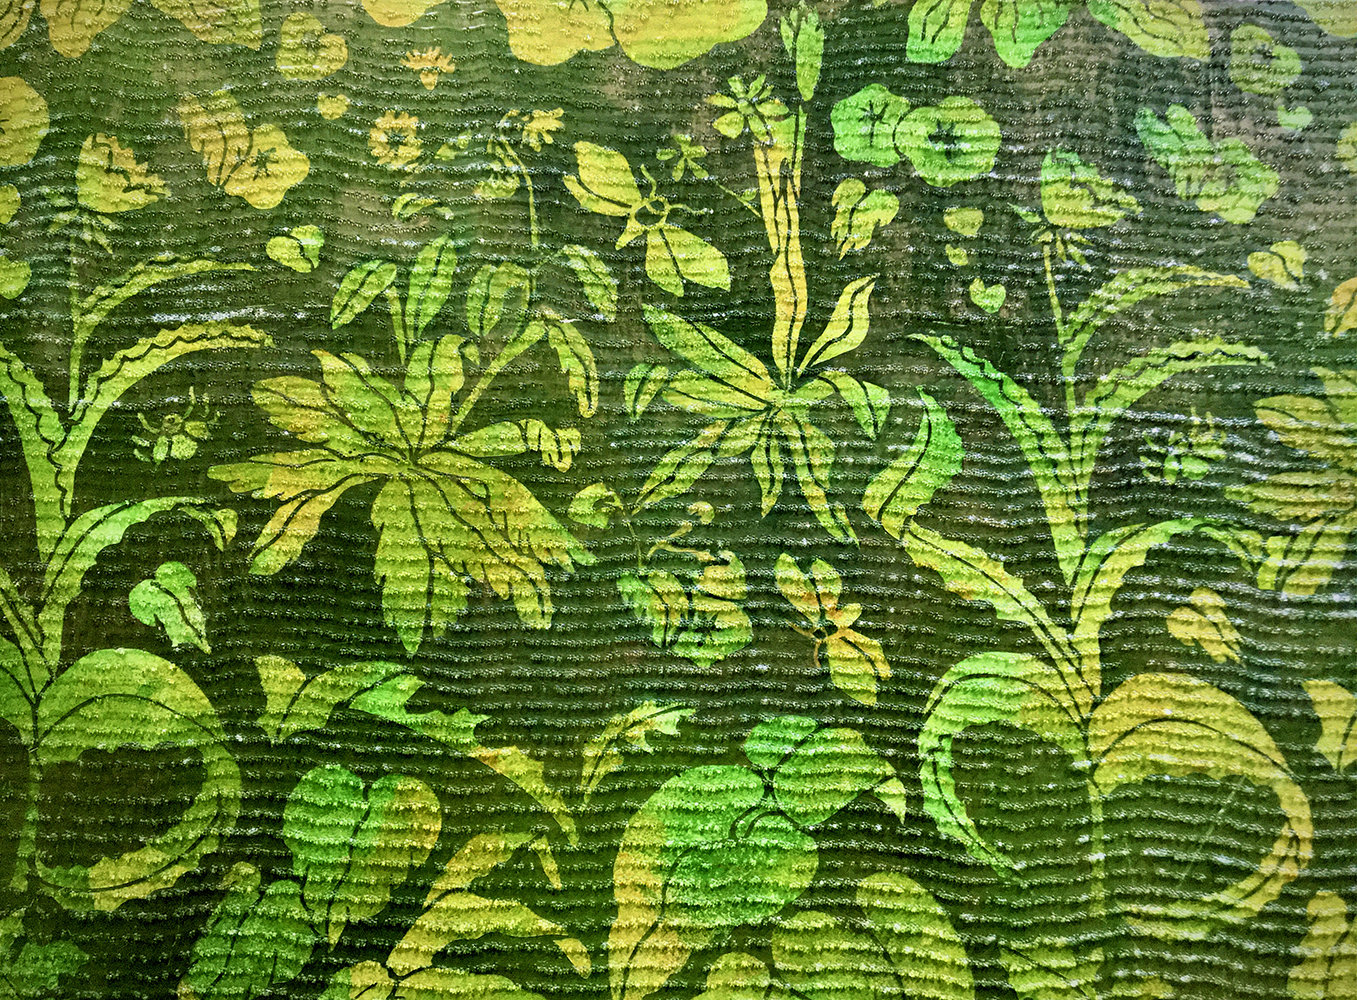
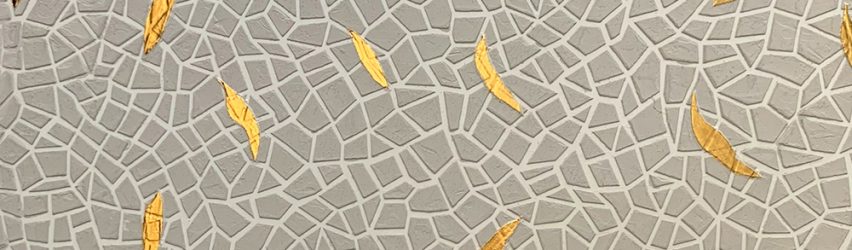
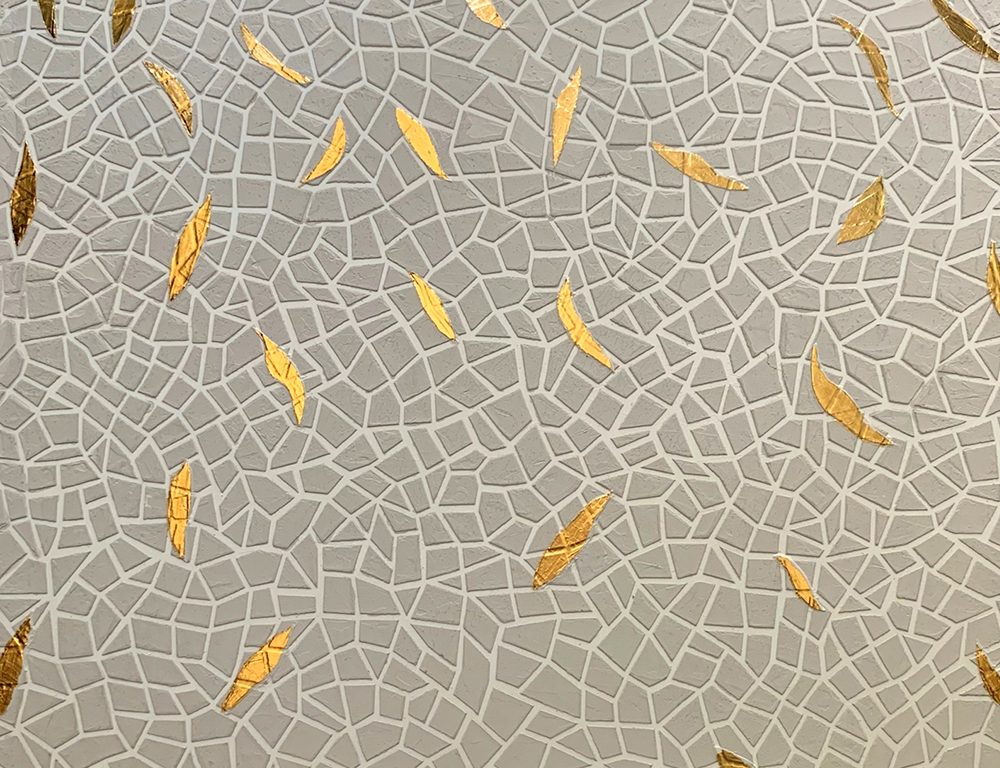
Introduction: This pattern was inspired by the design technique of Mille Fleur, seen in many European tapestries made during the Renaissance. It’s also a finish that reflects the exquisite beauty of plant-life and the eco-system that it supports. The horizontally combed glass beads add a sparkly “gilded-lily” affect. One Thousand Flowers pattern stencil was designed by us specifically for this Golden Paintworks finish.

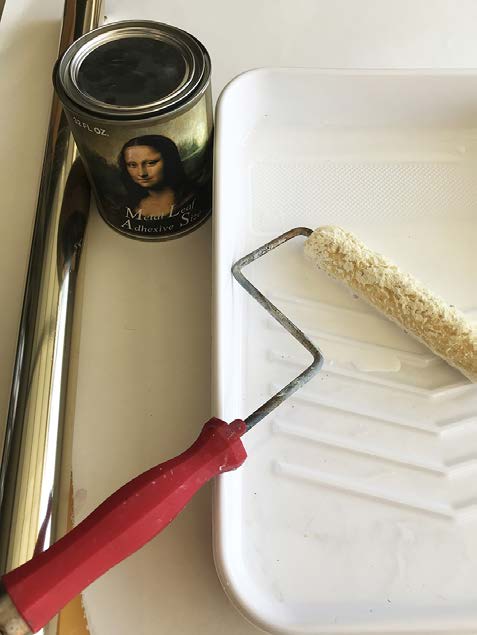
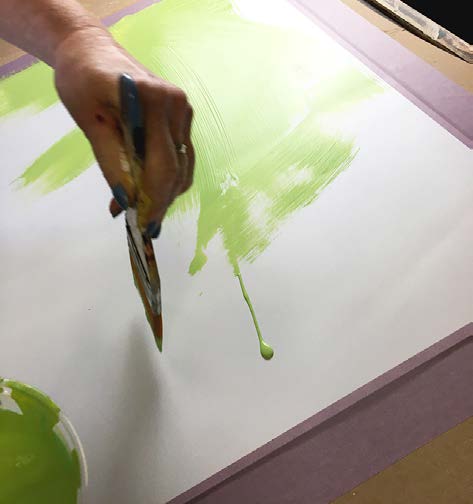
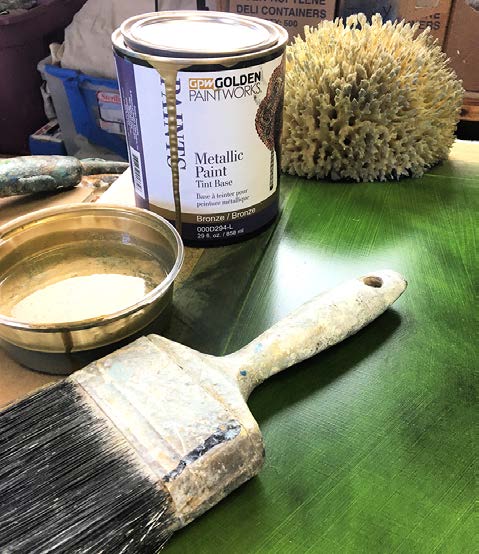
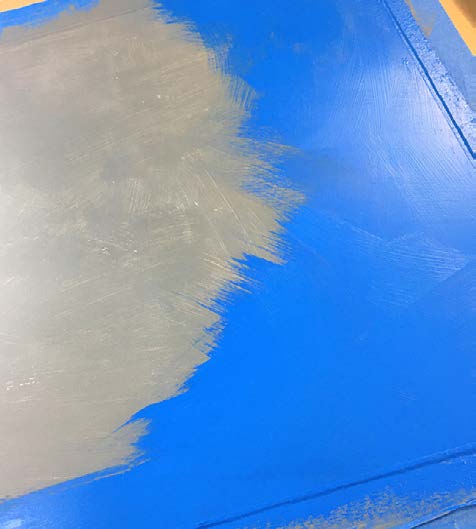
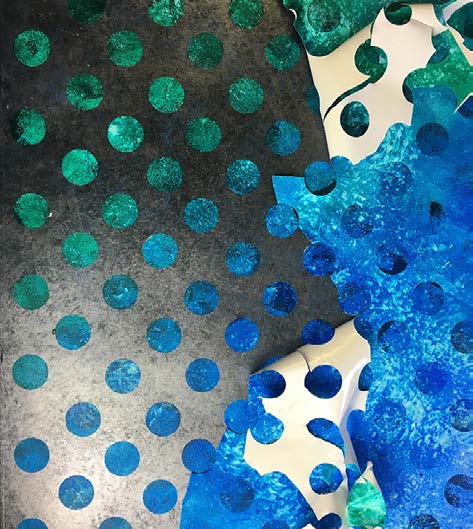
1 | Prep, prime, and apply a solid coat of Benjamin Moore Sweet Pea 2031-30 in a matte sheen. Allow to dry completely.
(Photo 1)

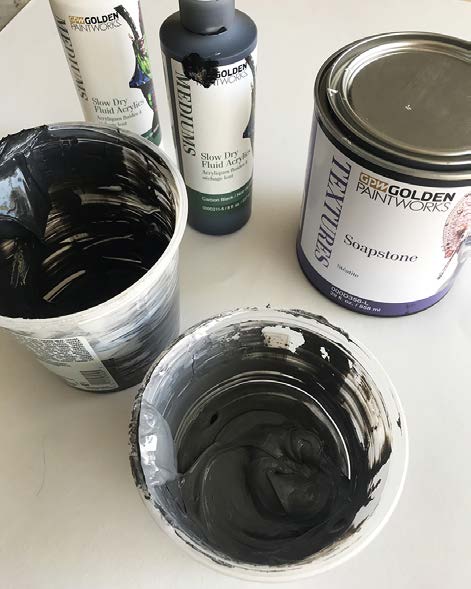
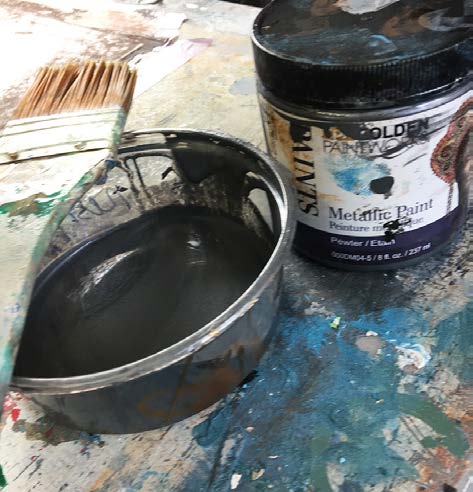
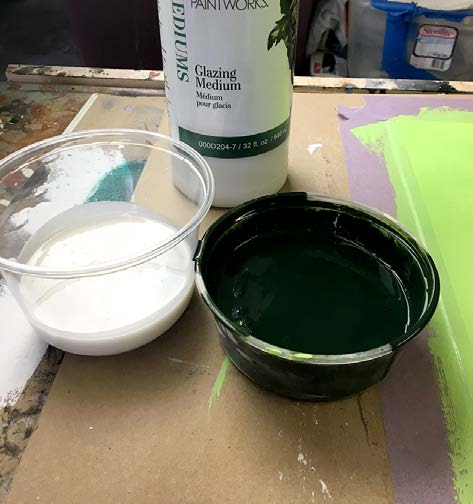
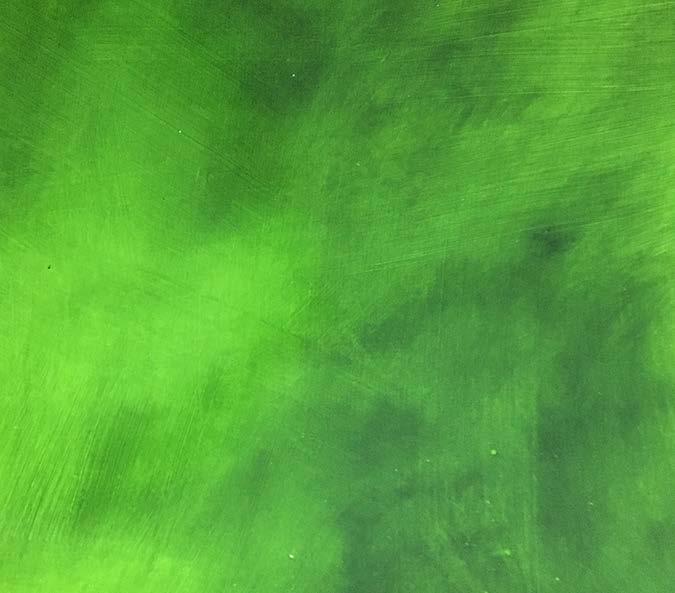
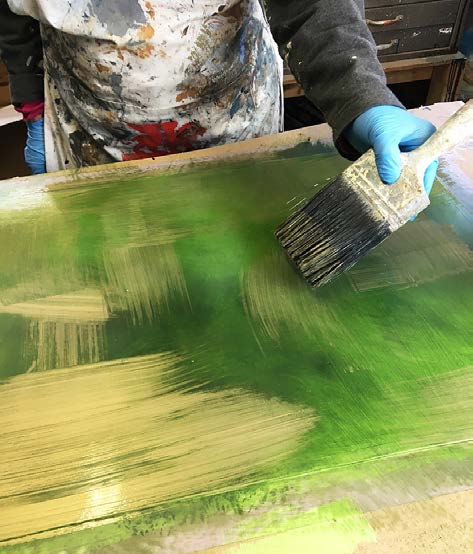
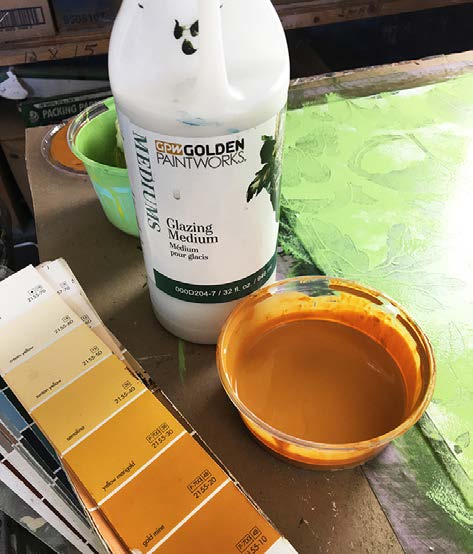
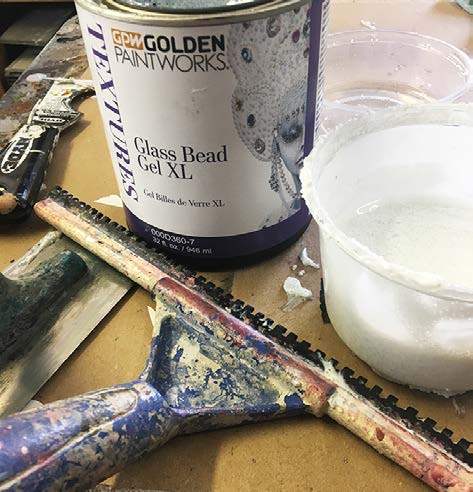
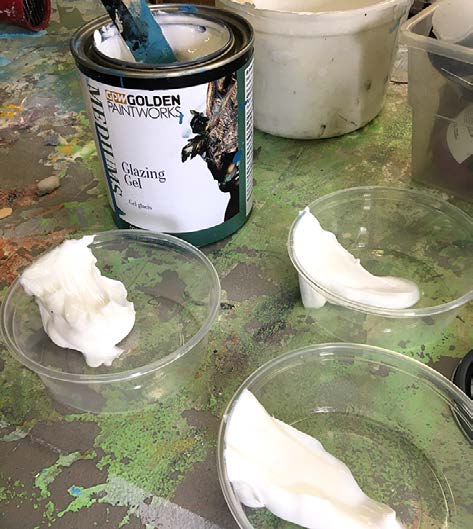
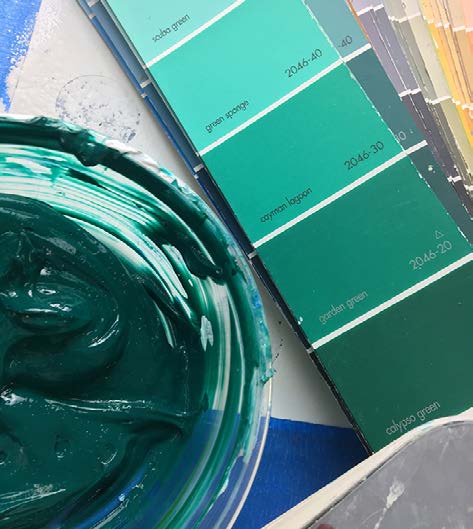
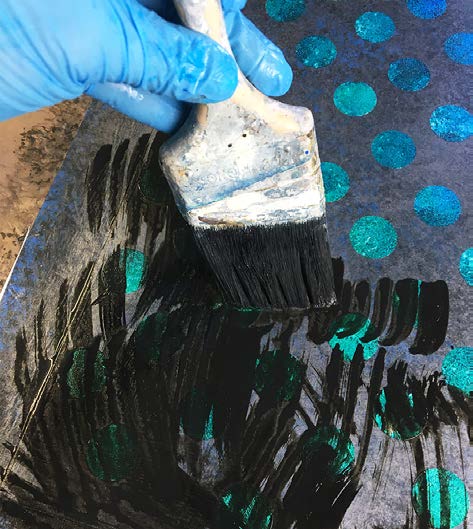
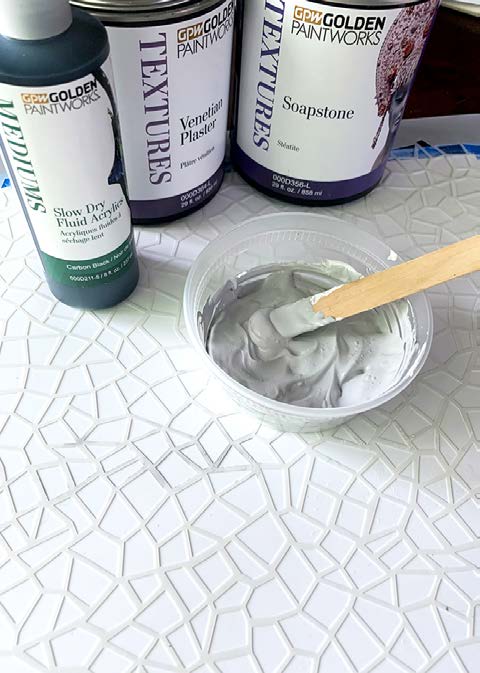
2 | Mix one part Glazing Medium with Slow Dry Fluid Acrylics Chromium Oxide Green, Carbon Black, and a bit of Burnt Umber to match Benjamin Moore Hunter Green, #2041-10. Add a little water and mix so that it is the consistency of whole milk.
(Photo 2)

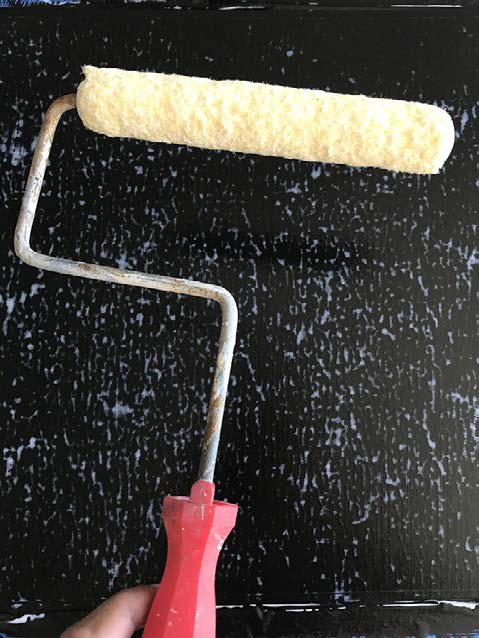
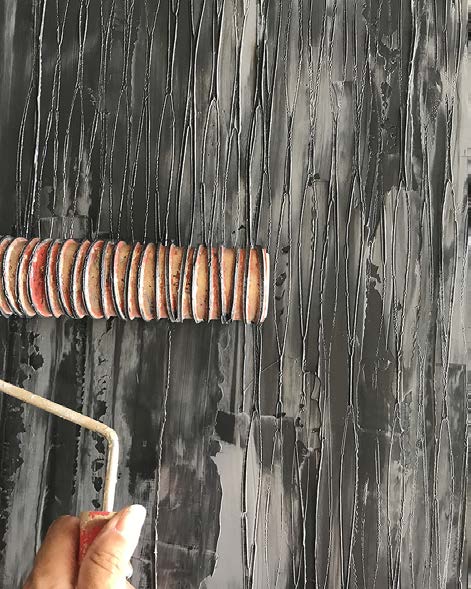
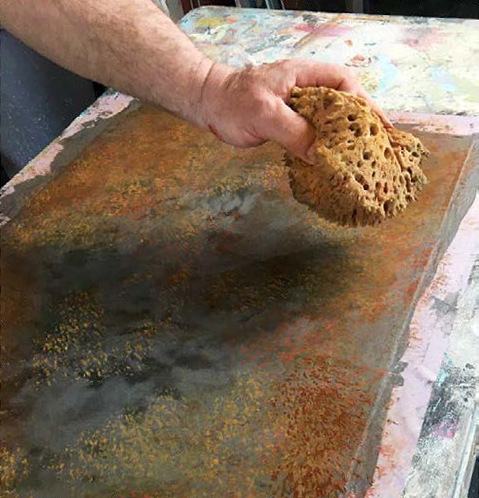
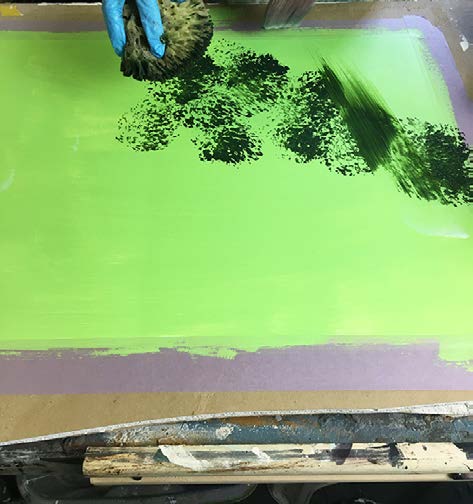
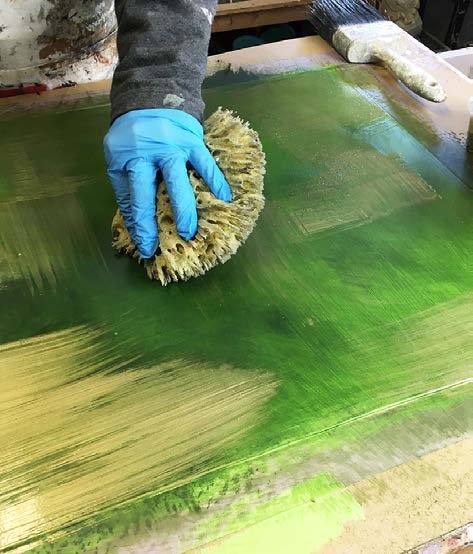
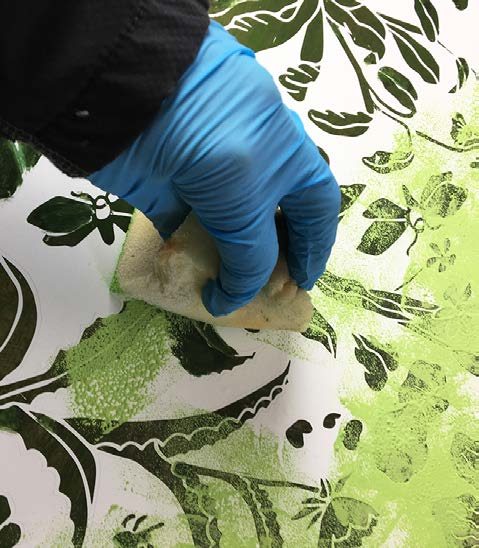
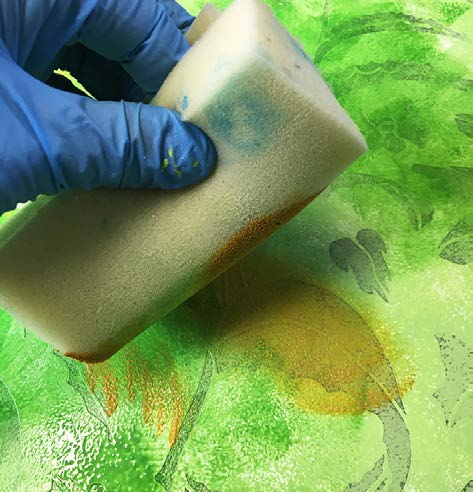
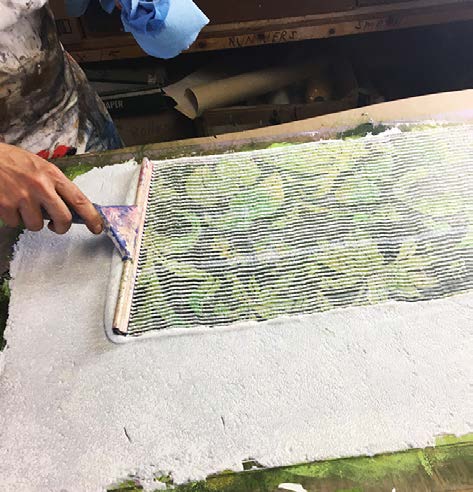
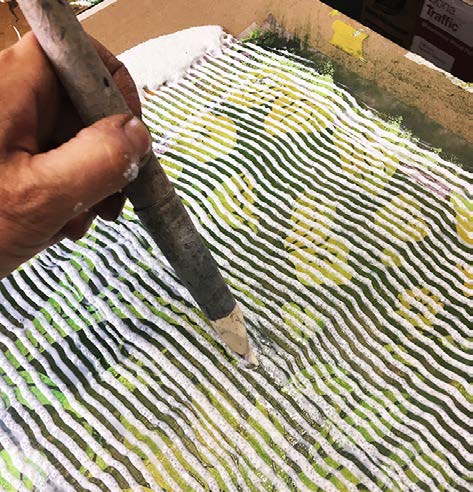
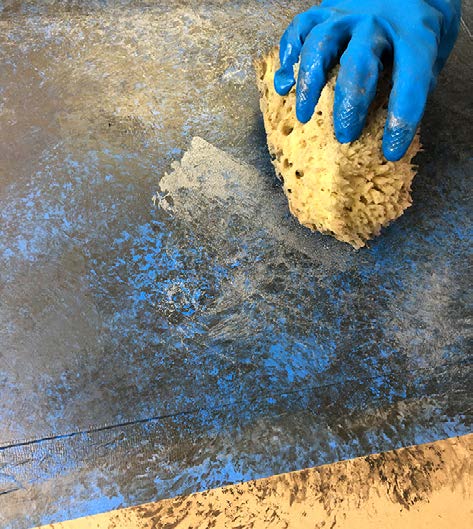
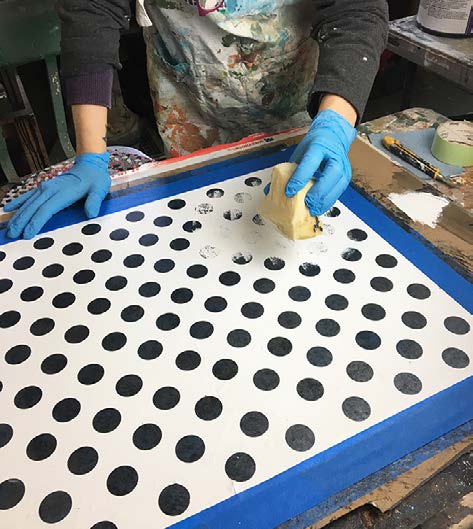
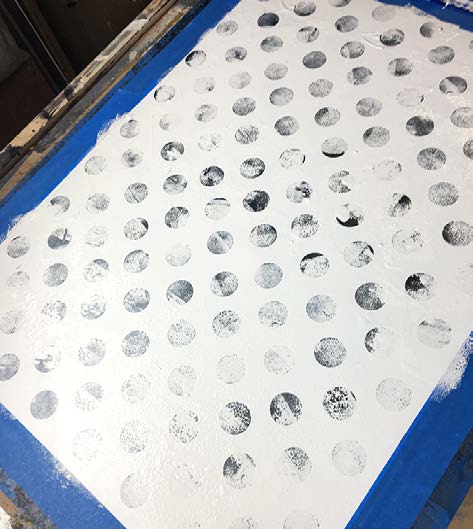
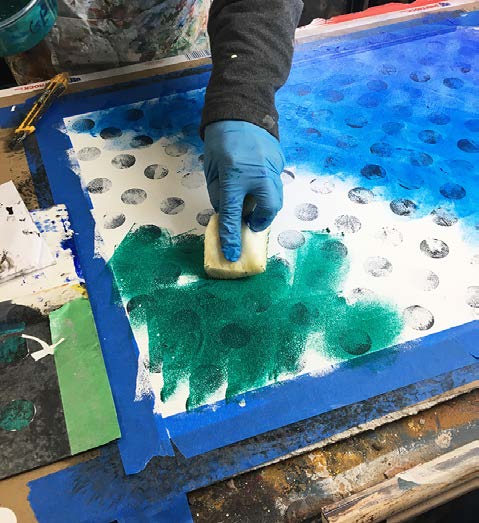
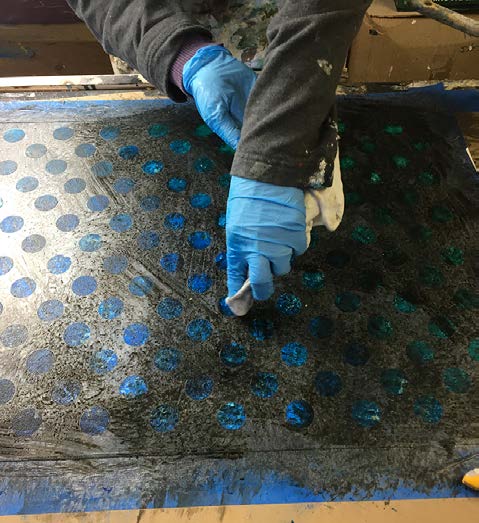
3 | Dip a damp, but not dripping, sea sponge into the dark green and tap onto the light green base coat in large shapes, covering only about 1/3 of the area.
(Photo 3)

4 | Mix another container of Glazing Medium with enough water to make a half and half cream consistency. With a large 3″ brush, swish over the sponged areas with the Glazing Medium to soften and blend the dark green glaze.
(Photo 4)

Allow to dry completely, and repeat step 2 two or three times more. Allow to dry completely.
(Photo 5)

5 | Water down the Pre-Mixed Metallic Paint Vintage Brass a little so that it is the same consistency as half and half cream. (Photo 6)

Apply it over the dark green finish in haphazard strokes with a large 3″ brush, covering about 1/3 of the area.
(Photo 7)

Tap gently with a clean damp sponge over the bronze brushstrokes. Allow to dry slightly, but not completely. Use a blow dryer to speed the partial drying process. With a damp sponge or damp cotton rag, gently wipe across the grain of the brushstrokes to remove some of the bronze paint, leaving an organically distressed appearance.
(Photo 8)

Rub harder depending on how dry the metallic paint has become. Allow to dry completely, approximately 24 hours.
(Photo 9)

6 | Apply your preferred floral stencil. The one we are using is a low-tack adhesive stencil. If using a mylar stencil, secure it with low-tack painter’s tape. Using a piece of upholstery foam with a flat section or a stencil brush, tap the Benjamin Moore Sweet Pea 2031-30 over the entire stencil as a base. Tap the brush or foam on a rag after loading with paint so that the application is fairly dry. Keep pouncing the light green over the stencil so that everything has had at least one layer. Leave this application to be un-even so that the over-all look will have a dappled-light affect. Allow to dry completely.
(Photo 10)

7 | Make the second stencil color by mixing one part Clear Top Coat Dead Flat with one part Slow Dry Fluid Acrylic Yellow Oxide. Make the third stencil color by mixing the same ratio Clear Top Coat Dead Flat and Slow Dry Fluid Acrylic Chromium Oxide Green.
(Photo 11)

8 | Stencil over everything with both colors, blending one color into the other to create a multi-layered, natural appearance.
(Photo 12)

If using a mylar stencil, remove the stencil immediately and let dry. If using a low-tack stencil, allow to dry completely for 24 hours, and then peel off the stencil to reveal the artwork.
(Photo 13)

9 | Mix eight parts Glass Bead Gel XL with one part water.
(Photo 14)

With a metal or plastic trowel, apply an even, flat coat over the entire surface.
(Photo 15)

With a notched rubber squeegee or a combing tool, apply pressure and drag horizontally across the surface, wiggling the tool as much as you desire. With a small rubber spatula, scrape the comb into a container to be re-used. Scoop up excess glass bead gel at the end of your drag, being careful not to bump into the finished drag section. Place the end of your tool to overlap 1″ of the previous section and drag next section. Repeat until wavy lines are done.
(Photo 16)

10 | Using a rubber subtractive tool, or the end of an artist paint brush covered in a damp rag, drag through any sections that are filled in solid. Allow to dry completely, approximately 10 hours.
(Photo 17)

Here is the final texture.
(Photo 18)

IMPORTANT NOTE: Clean up the Glass Bead Gel tools with soap and water in a separate bucket. Strain through a sieve or put clean-up water in a lidded container to throw out. Do not pour down the sink!

Featured Products

About the Artists
Amiel and Stephanie Mesner are a husband-and-wife team of fine artists who turned their love and knowledge of the fine and decorative arts into a company with over thirty-five years of experience, creating custom surface designs for the architectural and interior design industry. Arteriors, based in Natick, MA, handles professional design projects from idea and design creation through to finished application in a versatile, detail-oriented, expert manner. Dedicated to using eco-friendly decorative paint and plaster materials that are not only beautiful when applied, but responsible, Arteriors applies water-based paints and lime-based plasters, such as Venetian plasters, and American clay surface finishes which are safe, natural, and sustainable and can improve indoor air quality. 

More from this artist

Looking for more inspiration? Click here to view all of the decorative finishes from our Limited Edition Collections.

Decorative Finish: Blue Marble Finish

Blue Marble Finish by Arteriors
DECORATIVE FINISH HOW-TO

Blue Marble Finish

Artist: Arteriors

Share this article

PROJECT SUPPLIES:

INSTRUCTIONS:

Introduction: Blue Marble Finish is a decorative homage to Planet Earth, one that appears like a blue marble from outer space. This finish is a lot like lasagna; there are lots of steps, and if you follow them well you can’t go wrong. And who doesn’t like polka dots or blue marbles?

1 | Prep, prime, and apply a solid coat of Benjamin Moore Rocky Mountain Sky 2066-40 in a matte sheen. Allow to dry completely.
(Photo 1)

2 | Mix one part Glazing Medium with one part Slow Dry Fluid Acrylic Carbon Black. Add a little water and mix so that it is the consistency of whole milk. Paint over the Rocky Mountain Sky base in loose brush strokes, leaving lots of open spaces. Subtract the black glaze with a damp sea sponge by tapping over the wet paint and “smooshing” it into open areas, leaving an organic black and blue broken surface. Let dry. Use a blow dryer to speed up the drying process.
(Photos 2-3)

3 | Using the same subtractive technique as in Step 2, apply Pre-Mixed Metallic Paint Pewter over the blue and black finish. Water down the metallic paint a little so that it is the same consistency as half and half cream. Allow to dry, using a blow dryer to speed up the drying process. Repeat this step using the same metallic paint, or if you would like a lighter background use the Metallic Paint Tint Base Pearl. Allow the background to dry thoroughly, preferably 12 hours.
(Photos 4-6)


4 | Create your own stencil from mylar, which can be found in art stores, or purchase a polka dot pattern from a stencil company. The one we are using is a low-tack adhesive stencil. Apply the stencil to the surface, following instructions from the stencil company. If this will be an all-over stencil covering entire walls, we suggest using stencils specifically for all-over applications that have registration marks so that pattern can be repeated seamlessly over the entire surface. After the stencil is adhered, use a damp but wrung out upholstery foam to apply satin white paint in a mottled way, and not completely solid. Let dry.
(Photos 7-8)

5 | Tint Glazing Gel with Slow Dry Fluid Acrylics Phthalo Green (Yellow Shade), Phthalo Blue (Green Shade), and Ultramarine Blue. Ensure the individual colors are opaque but that they don’t overpower the Glazing Gel.
(Photos 9-12)

6 | Using the three color gels, apply with flat sections of upholstery foam, or with a stencil brush over the stencil. Dab the loaded foam or stencil brush on a paper towel before stenciling so the paint goes on the surface fairly dry. Create an ombre effect by blending bands of the three colors together. Keep these colors wet for the next step.
(Photo 13)

7 | While these colors are still wet, use a damp sea sponge to pounce and twist over the stenciled dots, subtracting bits of color, and revealing some of the original dark and white undercoat.
(Photo 14)

8 | Once the blue and green paint layers dry, remove
the stencil.
(Photo 15)

9 | OPTIONAL: Repeat Step 2 over the stenciled dots and background, but reduce the coverage by approximately half. While this layer is still wet, wrap a couple layers of a damp cotton rag around your index finger and wipe off the centers of the dots, moving the rag to a clean section every two or three dots.
(Photos 16–18)

Here is the finalized texture.
(Photo 19)

Featured Products

About the Artists
Amiel and Stephanie Mesner are a husband-and-wife team of fine artists who turned their love and knowledge of the fine and decorative arts into a company with over thirty-five years of experience, creating custom surface designs for the architectural and interior design industry. Arteriors, based in Natick, MA, handles professional design projects from idea and design creation through to finished application in a versatile, detail-oriented, expert manner. Dedicated to using eco-friendly decorative paint and plaster materials that are not only beautiful when applied, but responsible, Arteriors applies water-based paints and lime-based plasters, such as Venetian plasters, and American clay surface finishes which are safe, natural, and sustainable and can improve indoor air quality. 

More from this artist

Looking for more inspiration? Click here to view all of the decorative finishes from our Limited Edition Collections.

Decorative Finish: Mosaic Gold Leaf

Mosaic Gold Leaf by Aliya Riaz
DECORATIVE FINISH HOW-TO

Mosaic Gold Leaf

Artist: Aliya Riaz

Share this article

PROJECT SUPPLIES:

INSTRUCTIONS:

1 | Base a coat of primer and let dry. Using a trowel apply an even layer of Soapstone and allow to dry. I like using Soapstone when I need a non-absorbent smooth surface with a flat finish.
(Photos 1-2)

2 | Tint the Venetian Plaster with enough Slow Dry Fluid Acrylic Carbon Black to make an agreeable shade of light gray. Remember that the plaster will dry about 30% lighter. As a reference guide the wet plaster can be matched to Benjamin Moore Silver Lake 1598 or Sherwin-Williams March Wind 7668.
(Photo 3)

3 | Spray the repositionable adhesive over the back of the stencil and allow to dry for a few minutes. Now position the Mosaic & Leaf Stencil over the Soapstone and push the tinted Venetian plaster evenly through the pattern.
(Photo 4)

4 | Remove the stencil carefully and clean. Allow the tinted Venetian Plaster to dry for at least 6-8 hours. Burnish the dried Venetian plaster using a stainless steel trowel placed at a low angle to bring a soft sheen to the plaster.
(Photo 5)

5 | Use the repositionable adhesive behind the second layer of the leaf stencil. Allow to dry for a few minutes before positioning the stencil over the mosaic pattern. Using the blade, push Soapstone into the leaf shapes. Remove the stencil and allow to dry.
(Photo 6)

6 | Using a small artist’s brush, apply the water based size to the now dry leaf shapes.
(Photo 7)

7 | When the size reaches tack (follow the manufacturer’s instructions) apply the Dutch Metal Leaf to the sized leaves.
(Photo 8)

8 | Rub the leaf with a soft muslin cloth and remove any skewing that may have got caught in the “grout”. Here is the finalized texture.
(Photo 9)

Featured Products

About the Artist
Aliya Riaz is the creative force behind Portfauxlio Inc. She started the company in New Jersey in 2000 with the firm conviction that a great service backed by trust, accountability and putting clients first would gain a foothold in an often haphazard industry. Portfauxlio Inc. has built a reputation for excellence, integrity and unsurpassed designs. Aliya creates signature custom finishes for surfaces to meet the color and design preferences of her clients. These hand painted or applied finishes include authentic plasters and textures, faux marbles, exotic wood grains, gilding, decorative patterns, gorgeous glazes and custom hand painted wallpapers. 

More from this artist

Looking for more inspiration? Click here to view all of the decorative finishes from our Limited Edition Collections.