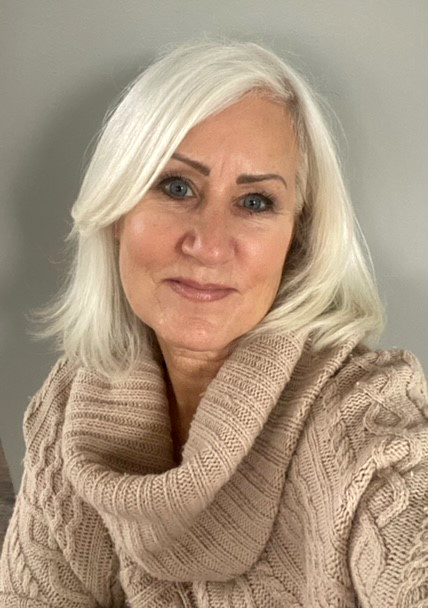
Decorative Finish: Boho Tones

DECORATIVE FINISH HOW-TO

Boho Tones

Artist: Studio by Shauna, Inc.

Share this article

PROJECT SUPPLIES:

INSTRUCTIONS:

Texture, sheen, and color… mixing it up for an updated finish that will accent any space with a vibe that’s designed AND relaxed. A matte woven wall finish with metallic threads underneath, topped with a mandala that is designed to both disappear and pop. Sexy, earthy, and playful in a colorful monochromatic style.

1 | Base coat surface with Golden Paintworks Pre-Mixed Metallic Paint Splendor. This layer will be a glimmer in the background of the “woven” texture, so it is not necessary to be concerned with roller lines.

2 | Mix 5% Glazing Medium and 5% Matting Additive to the Venetian Plaster.

3 | It is recommended to panel off the walls, plastering every other panel at a time. Apply the Venetian Plaster to the wall panel evenly.
(Photo 1)

4 | While wet, brush through the section horizontally and vertically with the wallpaper brush creating a woven texture. Offload brush on a terry cloth towel as needed.
(Photo 2) 

5 | Then, using the trowel at about a 45 degree angle and with very light pressure, knock down the weave here and there, creating an uneven ‘worn’ look. Areas with the weave will have thin “threads” of metallic color that the light will capture, while the knocked down areas will be smoother, like a time worn fabric.
(Photo 3)

6 | Continue technique on the alternating panels. Allow them to dry. Next, back tape completed panels and repeat technique on the remaining panels to be textured. Allow to dry.

7 | Create three color mixes for the stencil. Mix Glazing Gel and Pre-Mixed Metallic Paint Splendor in a ration of 2:1. Then add 5-10% Glazing Medium. Do the same with Pre-Mixed Metallic Paint Obsession and with Pre-Mixed Metallic Paint Roman Gold.
(Photo 4)

8 | Mark off the area on the wall where the stencil will go using painters tape. Spray the back of the stencil with the 3M Super 77 Spray Adhesive and wait about a minute or two. When tacky, apply to the marked area and smooth the stencil down onto the plastered surface using your hands to make sure that all the small areas are flush with the wall surface. It is recommended to use tape and paper around the outside of the stencil to avoid getting the metallic colored gel on the background.

9 | Starting in the center, apply the Gold mixture using a blue blade spatula or Japan scraper. This color should extend in diameter about 25%, keeping in mind you will overlap the edge and blend this with the next color.
(Photo 5)

10 | Next, apply the Splendor mixture, overlapping the gold slightly, 1-2 inches. Apply the Splendor mixture to extend about halfway out from the diameter of the design. Lastly, apply the Obsession mixture to the outer half of the design, overlapping with the Splendor mixture 2 to 3 inches.
(Photo 6)

11 | Before removing the stencil, pull the wallpaper brush through the design horizontally, creating a texture. Offload brush if necessary. It is ok to have highs and lows in the depth of the gel, as it will create the relaxed appearance of the finish.
(Photo 7)

12 | Remove the stencil and allow this half of the mandala to dry. Once dry, and before you paper off the completed half of the design, line up the stencil, noting the areas on the stencil where you will extend each color. Be mindful to extend the colors to the same area/diameter as the first half so that the tones match up.
(Photo 8)

13 | After applying the Glazing Gel colors, brush through with the wallpaper brush horizontally. Peel off the stencil and allow to dry. Here is the final finish
(Photo 9)

Featured Products

Studio By Shauna, Inc.

About the Artist
An artist celebrating over thirty years in the interior design industry, Shauna Oeberst Gallagher found her niche in the world of decorative finishing, marrying her love for both painting and interiors. With an education in Fine Art, and a degree in Interior Architecture, she started her career as an interior designer, then opened her decorative art business 24 years ago. Her work has graced many of the finest homes and businesses in Northern California in styles ranging from historical to contemporary. After teaching at local colleges for several years, she co-founded a decorative art school in 2004 and also began teaching nationally at events and conventions. Shauna has taught well over 1000 students throughout her career, as well as been published by Sunset books, contributed to DIY channel’s House Crashers, and consulted for HGTV on numerous projects. Teaching other artists to excel and enhancing their ability to create beauty in the world is a passion Shauna will continue with soulful direction. Shauna’s greatest joy is being mom to her twins, who motivate and inspire her to thrive in her business of creating sanctuary spaces for clients and making art that creates a connection with the viewer.

More from this artist

Looking for more inspiration? Click here to view all of the decorative finishes from our Limited Edition Collections.

Decorative Finish: Metallic Floral

"Metallic Floral" by Cecelia Claire.
DECORATIVE FINISH HOW-TO

Metallic Floral

Artist: Cecelia Claire

Share this article

PROJECT SUPPLIES:

INSTRUCTIONS:

1 | On a surface that has been primed and gessoed and applied with two coats of Metallic Paint Tint Base Pearl, create gestural petal shapes using Pre-Mixed Metallic Paint Splendor and a large round brush and/or filbert brush.
(Photo 1)

2 | Use a round brush to create the stems. To create gestural leaves, start with pressure and lift to a point as the stroke continues.
(Photo 2)

3 | Use a fan brush at the top and bottom of the petals to create shadows, highlights and contrast.
(Photo 3)

4 | Use the round brush to add detail such as the stamen or shading on the leaves. Here is the completed finish.
(Photo 4)

Featured Products

Cecelia Claire

About the Artist
Offering a fresh reimagining of the traditional decorative painter, Cecelia creates hypercustomized handpainted surfaces for residences, retail and hospitality. Her creations include bespoke murals and wallcoverings on a variety of substrates including silk and gold foil, as well as digitally printed wallpaper and textiles from original painted designs.

Learn more about Cecelia in our Behind the Texture artist feature series.

More from this artist

Looking for more inspiration? Click here to view all of the decorative finishes from our Limited Edition Collections.

Decorative Finish: Misty Landscape

"Misty Landscape" by Cecelia Claire.
DECORATIVE FINISH HOW-TO

Misty Landscape

Artist: Cecelia Claire

Share this article

PROJECT SUPPLIES:

INSTRUCTIONS:

1 | Set up a palette with the latex interior paint, a dot of Slow Dry Fluid Acrylic Raw Umber, and the Glazing Medium, as pictured.
(Photo 1)

2 | Mix the Raw Umber into the interior paint and the Glazing Medium. Add Titanium White mural paint to the palette. Add Glazing Medium to the Titanium White.
(Photo 2)

3 | On a surface primed with interior primer or gesso, create a blended gradient using a large brush, with more white and cloud shapes at the top. Blend out the edges to create a soft effect.
(Photo 3)

4 | Using a mid-tone blend of paints from your palette, create a foreground. Begin to create a treeline on the foreground.
(Photo 4)

5 | Blend thin coats of darker paint mix into the clouds for shadows, and thin coats of lighter paint mix as a “mist” on the treeline.
(Photo 5)

6 | Using mid-tones painted on with a round brush, continue to add detail. Extend the treeline, add middle ground trees, and foreground plants. Use more contrast as you get closer to the foreground.
(Photo 6)

7 | Continue adding detail by creating shadows from a darker paint blend, and using thin coats of a lighter paint blend with plenty of Glazing Medium to create a misty glaze.
(Photo 7)

8 | Add high-contrast foreground detail using Slow Dry Fluid
Acrylic Raw Umber and Titanium White – no blending necessary.
Here is the completed finish.
(Photo 8)

Featured Products

Cecelia Claire

About the Artist
Offering a fresh reimagining of the traditional decorative painter, Cecelia creates hypercustomized handpainted surfaces for residences, retail and hospitality. Her creations include bespoke murals and wallcoverings on a variety of substrates including silk and gold foil, as well as digitally printed wallpaper and textiles from original painted designs.

Learn more about Cecelia in our Behind the Texture artist feature series.

More from this artist

Looking for more inspiration? Click here to view all of the decorative finishes from our Limited Edition Collections.

Decorative Finish: Metallic Chinoiserie

"Metallic Chinoiserie" by Cecelia Claire.
DECORATIVE FINISH HOW-TO

Metallic Chinoiserie

Artist: Cecelia Claire

Share this article

PROJECT SUPPLIES:

INSTRUCTIONS:

1 | Coat the surface in latex house paint with included primer. Once it has dried, paint leaf and stem shapes using the two green tones, and flowers in two red/pink tones and white.
(Photo 1)

2 | Using Slow Dry Fluid Acrylic Titanium White, create highlights on the leaves, darker petals and stems. The highlights will create a “glow” effect. You can also mix the Titanium White into the metallic paints and Slow Dry Fluid Acrylics to achieve mid-tones.
(Photo 2)

3 | On the white flowers, add light pink tones using Golden Paintworks Pre-Mixed Metallic Paint Splendor with a filbert brush or round brush. Reinforce light areas of the petals with another layer of Slow Dry Fluid Acrylic Titanium White.
(Photo 3)

4 | Add depth and contrast to the ligher pink tones using Pre-Mixed Metallic Paint Vintage Copper. Continue adding detail – light lines on dark areas, dark lines on light areas, until the desired effect is reached.
(Photo 4)

5 | Here is the completed finish.
(Photo 5)

Featured Products

Cecelia Claire

About the Artist
Offering a fresh reimagining of the traditional decorative painter, Cecelia creates hypercustomized handpainted surfaces for residences, retail and hospitality. Her creations include bespoke murals and wallcoverings on a variety of substrates including silk and gold foil, as well as digitally printed wallpaper and textiles from original painted designs.

Learn more about Cecelia in our Behind the Texture artist feature series.

More from this artist

Looking for more inspiration? Click here to view all of the decorative finishes from our Limited Edition Collections.

Decorative Finish: Blue & White Magnolias

"Blue & White Magnolias" by Cecelia Claire.
DECORATIVE FINISH HOW-TO

Blue & White Magnolias

Artist: Cecelia Claire

Share this article

PROJECT SUPPLIES:

INSTRUCTIONS:

1 | On a surface primed and roller-coated with two coats of Golden Paintworks Mural & Theme Paint Royal Blue, sketch a blossom and branch design with a white chalk pencil.
(Photo 1)

2 | Using a round brush, fill the outlines of the sketch in with Golden Paintworks Mural & Theme Paint Titanium White. Allow to dry.
(Photo 2)

3 | Rinse and dry the round brush and use a thin coat of Slow Dry Fluid Acrylic Ultramarine Blue to create the volume and contrast of the petals.
(Photo 3)

4 | Continue with a thin coat on the stems and leaves, leaving some white at the top of the shapes for contrast.
(Photo 4)

5 | Add darker, contrasting detail along the branches and petals using a narrow line of Slow Dry Fluid Acrylic Ultramarine Blue applied thickly with a liner brush. “Erase” any stray chalk lines by re-applying the Golden Paintworks Mural & Theme Paint in Royal Blue over those areas.
(Photo 5)

6 | Here is the completed finish.
(Photo 6)

Featured Products

Cecelia ClaireAbout the Artist
Offering a fresh reimagining of the traditional decorative painter, Cecelia creates hypercustomized handpainted surfaces for residences, retail and hospitality. Her creations include bespoke murals and wallcoverings on a variety of substrates including silk and gold foil, as well as digitally printed wallpaper and textiles from original painted designs.

Learn more about Cecelia in our Behind the Texture artist feature series.

More from this artist

Looking for more inspiration? Click here to view all of the decorative finishes from our Limited Edition Collections.

Decorative Finish: Harlequin Diamond

DECORATIVE FINISH HOW-TO

Harlequin Diamond

Artist: Linette Pedigo

Share this article

PROJECT SUPPLIES:

INSTRUCTIONS:

1 | Draw out harlequin diamond pattern with pencil and ruler to fit space. Take 3/8 inch painters tape to tape off shapes along the pencil lines.
(Photo 1)

2 | Roll on a coat of Fresco with the mini roller, trying to maintain a similar thickness throughout, with a stippled texture created by the roller.
(Photo 2)

3 | While the Fresco is still wet, take the Japanese scraper trowel and lightly trowel the Fresco to created a soften looks with movement and some stipple. Remove tape when still wet and wait to dry completely.
(Photo 3)

4 | Once dry, base coat entire area with SW 6070 Herron Plume.

5 | Mix 1 part SW 6184 Austere Gray to 2 parts of Golden Glazing Medium. Use the chip brush and the damp cotton rag to glaze the entire finish, paying attention to getting the glaze down into the recessed lines. Let dry.
(Photo 4)

6 | Mix 1 part SW 7024 Functional Gray to 4 parts of Golden Glazing Medium. Use the chip brush and the damp cotton rag to glaze the entire finish, paying attention to getting the glaze down into the recessed lines. Let dry.
(Photo 5)

7 | Mix 1 part SW 6430 Great Green to 4 parts of Golden Glazing Medium. Use the chip brush and the damp cotton rag to apply to areas here and there.
(Photo 6)

8 | Here is the final finish.
(Photo 7)

Featured Products

About the Artist
Artist Linette Pedigo began her professional career a little differently than most. Upon receiving her B.A. in Studio Art from Indiana University in 2003, she immediately began painting murals and applying faux finishes in builders’ model homes, private residences and businesses around central Indiana. In 2009, after many years of success, Linette formed her company, Linette’s Painting & Fine Art LLC, where she took her decorative painting skills to the next level. From large-scale murals to exquisite, hand-applied faux finishes, Linette uses her expertise in color theory and technique to always put forth a fantastic finished product. Now, with almost 20 years in the business, Linette has clients all around the United States that love her modern and artistic take on projects, always staying up to date on trends, products and color palettes. 

Learn more about Linette in our Behind the Texture artist feature series.

Looking for more inspiration? Click here to view all of the decorative finishes from our Limited Edition Collections.

Behind the Texture with Janell Keneske

Behind the Texture

with Janell Keneske

Share this article

I am a decorative painter who is very fortunate to be enjoying my passion for art and all it has to offer. I’ve always been very creative at an early age and blessed with a natural ability to create something from nothing. After pursuing a career in business and fashion, I found myself empty and bored. I was always duplicating rooms I’d seen in magazines, and everyone was telling me I was wasting my talents. With no forethought, only 3 month’s salary in the bank, and one client, I quit my job and I’ve never looked back.

What are some of your favorite decorative trends? 
What’s trending now is texture. My most popular finishes are on fireplaces and kitchen hoods. GPW Soapstone looks amazing on fireplaces and can be easily tinted by hand. GPW metallic textures are my favorite go-to and my number one seller. I am often asked to duplicate a wallpaper, as clients do not like seeing the lines. What’s really beautiful about the metallic textures is that they are timeless. They can be modern, as well as traditional.

What are your thoughts on Pantone’s color of the year Pantone 13-1023 Peach Fuzz?
Color can transform a room from dull to dazzling. Pantone Peach Fuzz is a cozy color I love. I’m in the process of using a warmer version of it on two armoires, with GPW Metallic Pewter brushed on top. The pieces will be stunning!

What does a work day look like for you?
An average workday for me is non-stop, up and down ladders. There are constant changes and sometimes drama, but it all works out in the end. It is so rewarding when your client is amazed at what you’ve created for them. We always celebrate the end of a great project by going out for a great dinner and a good glass of wine.

When you’re not at work, what can we find you doing?
When I’m not at work, you can most likely find me outdoors. I’m an avid traveler – on the slopes in the winter and beach in the summer – exploring all the world has to offer. 

If we came to your city, we shouldn’t leave without doing what?
I live in central New Jersey, so I’m close to NYC, Philly and the beach. I’d say you must visit the Jersey shore. There is nothing better than listening to the waves and smelling the ocean air.

You May Also Like

Follow Us!

Decorative Finish: Resistenza

DECORATIVE FINISH HOW-TO

Resistenza

Artist: Chimenti Studios

Share this article

PROJECT SUPPLIES:

INSTRUCTIONS:

1 | Basecoat with Golden Paintworks Metallic Paint Tint Base Gold.

2 | Trowel on Weathered Granite (untinted).
(Photo 1)

3 | While Weathered Granite is still wet, use a comb tool and make marks horizontally and vertically.
(Photo 2)

4 | Apply Wunda Size with a chip brush, horizontally and vertically.

5 | Apply the Imitation Gold Leaf.
(Photos 3-4)

6 | Knock down the Imitation Gold Leaf with a scrub brush or brush of your choice.
(Photos 5-6)

7 | Dry brush [chip brush] the Gold Metallic Paint on top as you see fit.
(Photo 7)

8 | Add a clear coat of your choice to the wall to prevent the Imitation Gold Leaf from oxidizing. Here is the final texture.
(Photo 8)

Featured Products

Carrie Chimenti

About the Artist
Chimenti, a citizen of the USA and Italy began her sculpting career in Florence, Italy in 1996. She obtained a BFA in sculpture from Miami University in 1998 and an MFA in sculpture from American University, Italy in 2002. After completing her MFA, she worked for the world-renowned sculptor Beverly Pepper in Todi, Italy. In 2009 she completed a Japanese plaster course and since then, has continued her studies across the USA and has completed contract work for various WI builders, as well as subcontract work for other artistic wall and Italian plaster finishing companies in the USA. Chimenti has traveled to Florida, Ohio, Washington DC and New York City to complete Italian Plaster and decorative wall finishes for private home owners and commercial customers. Chimenti is typically in her studio sculpting personal, commissioned or charitable works while quoting/accepting projects for artistic walls & ceilings through Chimenti Studios.

More from this artist

Looking for more inspiration? Click here to view all of the decorative finishes from our Limited Edition Collections.

Decorative Finish: Corciano

DECORATIVE FINISH HOW-TO

Corciano

Artist: Chimenti Studios

Share this article

PROJECT SUPPLIES:

INSTRUCTIONS:

1 | Basecoat board with rust paint of your choice. Allow to dry.

2 | Trowel on MT 113 Cognac Copper, leaving some of the rust paint showing.
(Photo 1)

3 | Trowel on MT 112 Mojito Green, leaving some of the rust paint & Cognac Copper showing.
(Photos 2-3)

4 | Apply more rust paint and Mojito Green as you like for your composition.
(Photo 4)

5 | Spray on rust activator 100%.
(Photo 5)

6 | Here is the completed finish.
(Photo 6)

Featured Products

Carrie Chimenti

About the Artist
Chimenti, a citizen of the USA and Italy began her sculpting career in Florence, Italy in 1996. She obtained a BFA in sculpture from Miami University in 1998 and an MFA in sculpture from American University, Italy in 2002. After completing her MFA, she worked for the world-renowned sculptor Beverly Pepper in Todi, Italy. In 2009 she completed a Japanese plaster course and since then, has continued her studies across the USA and has completed contract work for various WI builders, as well as subcontract work for other artistic wall and Italian plaster finishing companies in the USA. Chimenti has traveled to Florida, Ohio, Washington DC and New York City to complete Italian Plaster and decorative wall finishes for private home owners and commercial customers. Chimenti is typically in her studio sculpting personal, commissioned or charitable works while quoting/accepting projects for artistic walls & ceilings through Chimenti Studios.

More from this artist

Looking for more inspiration? Click here to view all of the decorative finishes from our Limited Edition Collections.

Decorative Finish: Verde

DECORATIVE FINISH HOW-TO

Verde

Artist: Chimenti Studios

Share this article

PROJECT SUPPLIES:

INSTRUCTIONS:

1 | Basecoat with satin finish latex paint, color of your choice.

2 | Trowel on Weathered Granite, untinted.
(Photo 1)

3 | Work your way down with the trowel to meet up with a green tinted Weathered Granite [SW 6468].
(Photos 2-3)

4 | To achieve darker areas, use your green tint [tinted to match SW 6468] directly on the trowel and make horizontal “wavy” movements. The goal is to achieve a slight Ombre look.
(Photos 4-5)

5 | With a chip brush, dab Wunda Size centrally on the wall and let dry.

6 | Apply Imitation Gold Leaf to areas where you applied your Wunda Size.

7 | Knock down gold leaf with a brush.
(Photo 6)

8 | Add clear coat of your choice to wall. Here is the final finish.
(Photo 7)

Featured Products

Carrie Chimenti

About the Artist
Chimenti, a citizen of the USA and Italy began her sculpting career in Florence, Italy in 1996. She obtained a BFA in sculpture from Miami University in 1998 and an MFA in sculpture from American University, Italy in 2002. After completing her MFA, she worked for the world-renowned sculptor Beverly Pepper in Todi, Italy. In 2009 she completed a Japanese plaster course and since then, has continued her studies across the USA and has completed contract work for various WI builders, as well as subcontract work for other artistic wall and Italian plaster finishing companies in the USA. Chimenti has traveled to Florida, Ohio, Washington DC and New York City to complete Italian Plaster and decorative wall finishes for private home owners and commercial customers. Chimenti is typically in her studio sculpting personal, commissioned or charitable works while quoting/accepting projects for artistic walls & ceilings through Chimenti Studios.

More from this artist

Looking for more inspiration? Click here to view all of the decorative finishes from our Limited Edition Collections.